One of the first questions beginner astronomers ask is: “How much magnification does this telescope give?”
I know, because I’ve done it myself! After all, when you look at the Moon, planets, or distant star clusters, you want them to appear larger and more detailed.
But the truth is that magnification doesn’t come from the telescope alone — it comes from the combination of the telescope and the eyepiece you use.
Understanding telescope eyepiece magnification is one of the most important skills for anyone getting into amateur astronomy. Once you understand how eyepieces affect magnification, you’ll be able to:
- Choose the right eyepiece for different objects
- Avoid buying unnecessary accessories
- Get the best views your telescope can deliver
In this guide, we’ll explain telescope eyepiece magnification in simple terms. You’ll learn how to calculate magnification, what focal length means, and how to choose the right eyepieces for observing the Moon, planets, and deep-sky objects.
If you’re still choosing your first telescope, our guide How To Buy A Telescope – A Beginner’s Guide explains the key things beginners should look for.
TL;DR – Quick Explanation
This is THE thing to remember about magnification
Magnification = Telescope Focal Length ÷ Eyepiece Focal Length
For example:
- Telescope focal length: 1000mm
- Eyepiece focal length: 25mm
1000 ÷ 25 = 40× magnification
General rule:
- Longer eyepiece focal length = lower magnification
- Shorter eyepiece focal length = higher magnification
Typical ranges:
| Magnification | Best For |
|---|---|
| Low (20×–50×) | Star clusters, nebulae, scanning the sky |
| Medium (60×–120×) | Moon, galaxies, some planets |
| High (150×+) | Planets and lunar detail |
More magnification isn’t always better — clarity and brightness matter more than extreme zoom.
What Eyepiece Focal Length Means
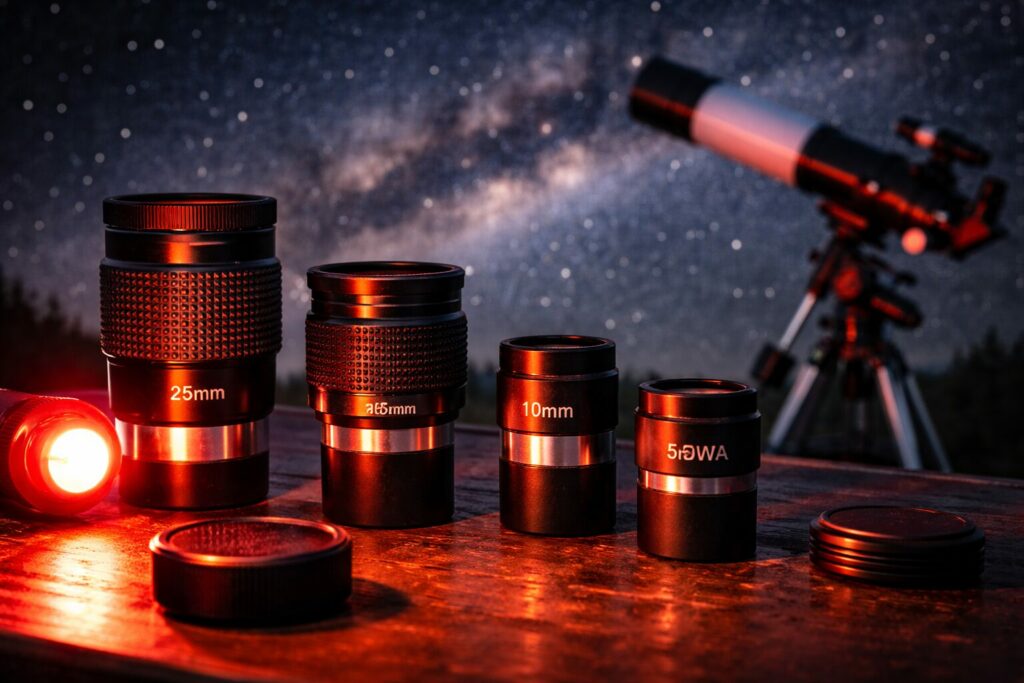
Every telescope eyepiece has a number printed on it, such as:
- 32mm
- 25mm
- 10mm
- 6mm
This number refers to the eyepiece focal length, measured in millimetres (mm).
In simple terms, focal length controls how much magnification the eyepiece produces when used with your telescope.
The key idea
- Long focal length eyepiece (25mm–40mm)
→ Lower magnification
→ Wider view of the sky - Medium focal length eyepiece (10mm–20mm)
→ Moderate magnification
→ Good for the Moon and many deep-sky objects - Short focal length eyepiece (4mm–9mm)
→ High magnification
→ Best for planets and lunar details
Think of eyepieces a bit like different zoom levels on a camera lens. Switching eyepieces changes how large the object appears in the telescope.
How to Calculate Telescope Magnification
Calculating magnification is surprisingly simple.
The Formula
Magnification = Telescope Focal Length ÷ Eyepiece Focal Length
Example 1
Telescope focal length: 900mm
Eyepiece: 25mm
900 ÷ 25 = 36× magnification
This is considered a low magnification view — great for scanning the sky or viewing large objects like the Orion Nebula.
Example 2
Telescope focal length: 900mm
Eyepiece: 10mm
900 ÷ 10 = 90× magnification
This is a medium magnification, ideal for:
- The Moon
- Jupiter’s moons
- Saturn’s rings
Example 3
Telescope focal length: 900mm
Eyepiece: 5mm
900 ÷ 5 = 180× magnification
This is high magnification, best used when:
- Atmospheric conditions are steady
- You are observing planets or lunar craters
Tip for beginners
Your telescope manual will usually list the telescope focal length, but if you’re unsure you can normally find it:
- Printed on the telescope tube
- In the telescope specifications
- On the manufacturer’s website
Telescope Eyepiece Magnification Chart
Here is a simple example using a 1000mm focal length telescope, which is common for many beginner telescopes.
| Eyepiece Focal Length | Magnification | Typical Use |
|---|---|---|
| 32mm | 31× | Wide sky views, large nebulae |
| 25mm | 40× | Star clusters, scanning |
| 20mm | 50× | General observing |
| 15mm | 67× | Moon and bright objects |
| 10mm | 100× | Planets and lunar detail |
| 8mm | 125× | Jupiter and Saturn |
| 6mm | 167× | High power planetary viewing |
| 5mm | 200× | Maximum useful range for many telescopes |
You can use this chart if you want to upgrade your observing kit. Also take a look at our guide to The Best Telescope Eyepieces For Stargazing.
Low, Medium and High Magnification Explained
Different objects in the night sky look best at different magnifications.
Trying to use high magnification on everything is a common beginner mistake.
Low Magnification (20×–50×)
Low magnification provides:
- A wide field of view
- Brighter images
- Easier object tracking
Best for:
- Large star clusters
- Nebulae
- The Andromeda Galaxy
- Sweeping across the Milky Way
Example: Viewing the Orion Nebula looks spectacular with a 25mm or 32mm eyepiece.
Medium Magnification (60×–120×)
This is the most commonly used magnification range.
Best for:
- The Moon
- Globular clusters
- Smaller nebulae
- Bright galaxies
For example:
- The Moon looks incredibly detailed around 80×–120×
- You can start seeing cloud bands on Jupiter
High Magnification (150×+)
High magnification is best reserved for small bright targets.
Best for:
- Planetary detail
- Lunar craters
- Double stars
Examples:
- Seeing Saturn’s rings clearly
- Viewing Jupiter’s cloud bands
- Exploring lunar craters
However, high magnification only works well when atmospheric conditions (seeing) are stable.
Maximum Useful Magnification
Many beginners assume telescopes should always be used at the highest magnification possible. In reality, every telescope has a practical magnification limit.
A common rule of thumb is: Maximum useful magnification ≈ 50× per inch of telescope aperture
For Example:
| Telescope Aperture | Maximum Useful Magnification |
|---|---|
| 70mm | ~140× |
| 90mm | ~180× |
| 130mm | ~260× |
| 200mm | ~400× |
Going beyond this limit usually results in:
- Blurry images
- Dim views
- Poor detail
This is why optical quality and aperture matter more than extreme magnification claims.
How to Choose the Right Eyepiece Magnification
Instead of chasing maximum magnification, aim for a balanced set of eyepieces.
A good strategy is to have three magnification levels:
1. Low Power Eyepiece
Usually 25mm–32mm
Great for:
- Finding objects
- Wide star fields
- Large deep-sky objects
2. Medium Power Eyepiece
Usually 10mm–15mm
This will probably become your most frequently used eyepiece.
Great for:
- The Moon
- Many galaxies and nebulae
- General observing
3. High Power Eyepiece
Usually 5mm–8mm
Best used for:
- Planets
- Lunar detail
- Double stars
With these three eyepieces, you can comfortably observe most objects in the night sky.
Beginner Eyepiece Kit Recommendation
If you are building your first eyepiece collection, you don’t need a huge number of eyepieces.
A simple three-eyepiece kit works extremely well.
| Eyepiece | Magnification Type | Typical Use |
|---|---|---|
| 25mm | Low power | Deep-sky objects |
| 12mm | Medium power | Moon and general observing |
| 6mm | High power | Planets |
Optional upgrade:
Add a 2× Barlow lens, which doubles magnification.
For example:
- 25mm → behaves like 12.5mm
- 12mm → behaves like 6mm
This effectively doubles the number of magnification options without buying many eyepieces — see our guide to the Best Barlow Lens For Your Telescope.
Common Beginner Mistakes
Learning how eyepiece magnification works helps avoid some very common mistakes.
1. Chasing extreme magnification
Many beginner telescopes advertise “400× magnification!”
In reality, this level of magnification is rarely usable due to atmospheric turbulence.
2. Using high magnification too soon
New observers often start with the highest power eyepiece.
Instead:
- Start with low magnification
- Locate the object
- Increase magnification gradually
3. Ignoring seeing conditions
The Earth’s atmosphere is constantly moving.
Even a powerful telescope may struggle to go beyond 150×–200× on many nights.
4. Buying too many eyepieces
It’s easy to think you need every focal length available.
In reality, 3–5 well-chosen eyepieces cover most observing situations.
Understanding telescope eyepiece magnification makes a huge difference to your observing experience. Instead of guessing which eyepiece to use, you can quickly calculate magnification and choose the right one for the object you’re observing.
Remember these key points:
- Magnification depends on both the telescope and the eyepiece
- Longer eyepieces = lower magnification
- Shorter eyepieces = higher magnification
- Most observing happens in the 40×–150× range
- Extreme magnification is rarely useful
With just a few well-chosen eyepieces, you can explore everything from the craters of the Moon to distant nebulae and galaxies.
If you’d like to explore the topic in greater detail, Sky & Telescope has an excellent guide to understanding telescope magnification and eyepieces.
Magnification Explained – FAQ’s
The shortest focal length eyepiece produces the highest magnification. For example, a 5mm eyepiece produces more magnification than a 25mm eyepiece.
No. Higher magnification often produces dimmer and blurrier images. Many objects actually look better at lower magnifications.
The Moon looks fantastic at 80×–150× magnification. This allows you to see craters, mountains and shadow detail clearly.
Most planetary observing happens between 120× and 200×, depending on telescope size and atmospheric conditions.
Yes. A 2× Barlow lens doubles magnification, while a 3× Barlow triples it. They are a cost-effective way to expand your eyepiece options.