If you’re into the idea of taking pictures of the night sky, but feel a bit daunted by the prospect, then the good news is that astrophotography for beginners has now become both surprisingly easy and affordable.
If you would like to produce photos of the moon and planets, or deep sky objects such as galaxies, nebulae and star clusters, then you can create some great images you’ll be thrilled with, without breaking the bank.
Astrophotography for beginners requires some kit to get started. So lets take a look at some options for what you’ll need, how they work, and things to look out for.
- An Interchangeable Lens Camera
- DSLR Camera – The Basics
- Mirrorless Camera – The Basics
- The Camera Sensor
- Camera Pros and Cons
- The Camera Lens – From Wide Angle To Telephoto
- The Lens Aperture
- The Lens Focal Length
- Use A Camera Mount
- Tripod
- Star Tracker
- Telescope
- What Sort Of Photos Can I Take ?
- Landscape Shots
- Planetary Shots
- Moon Shots
- Deep Sky Objects
An Interchangeable Lens Camera
Set yourself up with an interchangeable lens camera. Either a DSLR (Digital Single Lens Reflex) camera, or a mirrorless camera are great for astrophotography. Both types work in different ways…
DSLR Camera – The Basics
The light coming through the lens of a DSLR is reflected by use of a mirror angled at 45 degrees inside the camera. You then see what it is you are shooting through an optical viewfinder.
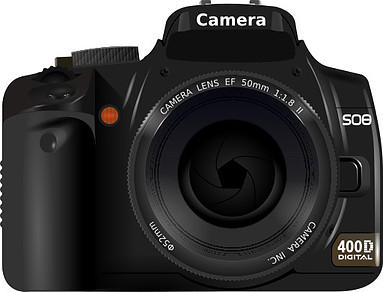
When you take a picture the mirror flips upwards letting the light directly through. The shutter then opens up and the light falls onto the image sensor. The shutter remains open for the required length of time, then shuts, and the mirror falls back into place.
Mirrorless Camera – The Basics
Whereas a DSLR uses a mirror to reflect the image to the viewfinder, a mirrorless camera is different in that light passes through the lens and directly onto the image sensor where it is processed.
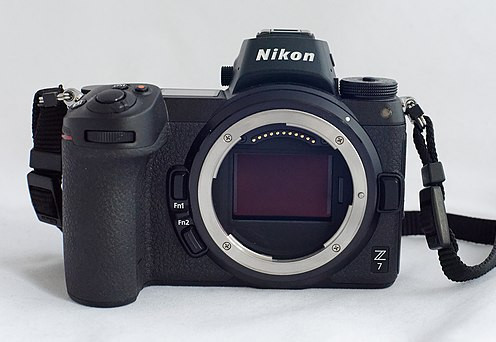
As there is no mirror, there is no optical viewfinder, but the mirrorless camera gets round this. The image sensor captures a preview of the image to display either on a small electronic viewfinder on the top, or the monitor on the back of the camera.
The Camera Sensor
The sensor in your camera is like the electronic equivalent of film, and it’s the bit of the camera hardware which is responsible for capturing light and converting it into an image. These come in different sizes as either a ‘full frame’ sensor or the ‘crop’ sensor.
A full frame sensor is the largest at 36mm x 24mm, and this is the same size as a frame of the old standard 35mm film. A crop sensor refers to any sensor smaller than full frame, of which there are a variety of sizes.
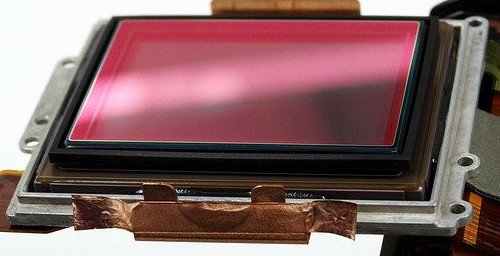
The size of the sensor is important because it has an effect on two specific things –
1.. How much light it can capture
2.. How wide your field of view will be, using the same lens.
Light is captured on the sensor by individual light collectors called photosites. A 32MP sensor, for example, will have 32 million colour photosites capturing the light focused on it by the lens.
Full frame sensors are often regarded as having superior low light performance than crop sensors because their larger size means they can capture more light, resulting in a cleaner, more detailed, higher resolution picture.
A full frame sensor will produce a wider field of view than a crop sensor (with an equivalent lens). This is preferable if you want to take a night sky landscape photo.
On the other hand, if you are interested in planetary and deep sky photography, a cropped sensor may be preferred. The narrower field of view and higher magnification you will get can help to close in on your target better than with a full frame camera.
DSLR & Mirrorless Camera – Pros and Cons
Not so long ago it would have been the DSLR which would have been thought of as the best buy in astrophotography for beginners. The mirrorless camera though has seen by far the greatest innovation in recent years, to the point where both types of camera system are more or less on a par with each other.
Even so, both types of camera have advantages and disadvantages.
DSLR Camera
Pros
- Better Optical Viewfinder
- Bigger choice of Lens
- Generally have longer battery life.
Cons
- DSLR design means it’s comparatively larger and heavier than Mirrorless Camera
- Heavier camera means in all probability a heavier, more expensive tracking mount
Mirrorless Camera
Pros
- Smaller and Lighter in design than a DSLR
- Better on screen focusing aids
- Greater innovation in Mirrorless cameras in recent years
Cons
- Shorter battery life largely due to the use of an electronic viewfinder
- Access to fewer lenses and accessories
The Camera Lens – From Wide Angle To Telephoto
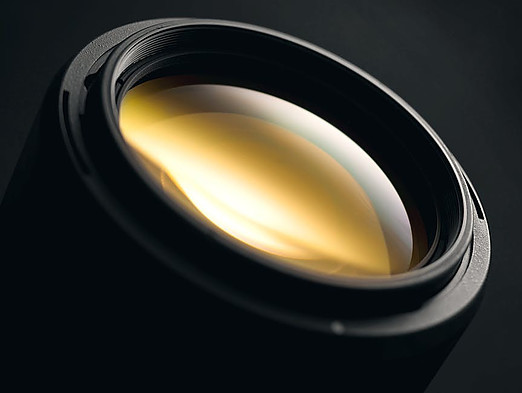
Interchangeable lens cameras accept a wide variety of different lenses, from wide angle lenses showing lots of detail, to telephoto lenses which bring the subject closer. The choice of camera lens used can have as big an impact on the quality of your photos as the camera you use.
The camera lens is usually described in a couple of ways, it’s maximum aperture and its focal length.
The Lens Aperture
An important factor when selecting a camera is it’s light gathering capabilities, and this holds true for the lens as well. The lens needs to pass as much light as possible through it to the camera’s sensor.
The opening of the lens through which light passes to enter the camera is called the aperture, and it works in a similar way to the pupil of your eye.
The hole (the aperture) at the centre of the lens can be made bigger or smaller, to allow more or less light to reach the camera sensor.
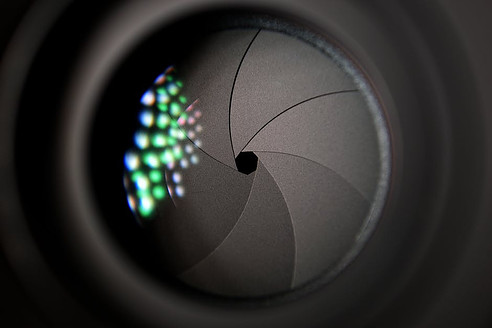
The blades in this lens block any light except through the aperture (centre hole)
The aperture setting is typically identified by an f-number, written as “f/” followed by a number, such as f/1.8, f/2.8, f/4, f/5.6, f/8 or f/11.
The rule of thumb here is this ..the lower the f-number the higher the aperture, and the more light that passes through the lens. Conversely, the higher the f-number the lower the aperture, and the less light that passes through the lens.
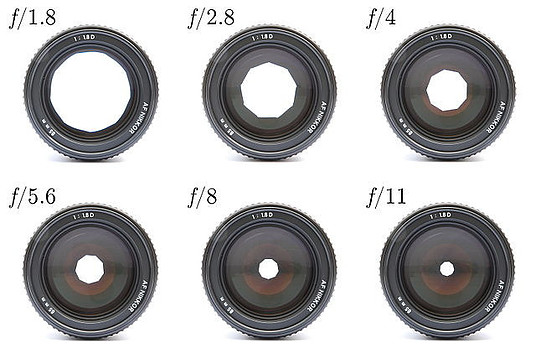
A lens with a large maximum aperture is often described as a ‘fast’ lens. A bigger aperture (small f-number) allows more light to reach the sensor which means faster shutter speeds can be used in low light situations. As a result ‘fast’ lenses are ideal for astrophotography.
The Lens Focal Length
The focal length is measured as the distance between the lens and the image sensor when the subject is in focus, and this is measured in millimetres (eg 24mm, 50mm or 100mm). This tells us how much of a particular scene will be captured by that lens, and is referred to as the angle of view.
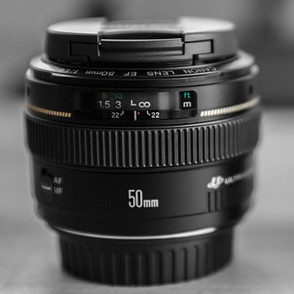
The key thing to know about angle of view is that short focal lengths (eg 24mm) have a wide angle of view which captures a greater area of a scene. Long focal lengths (eg 100mm) have a narrow angle of view which capture a smaller area of the scene.
What ‘ISO’ Means And Why It’s Important
ISO stands for International Standard Organisation which is the governing body that sets sensitivity standards for digital cameras.
The ISO rating of a camera determines the light sensitivity of a digital image sensor. As you increase the ISO, the sensor becomes more sensitive to light. This is especially useful for astrophotography.
Where tiny pinpricks of light from stars in the night sky maybe seen with the naked eye, a camera may find it more difficult to pick up.
To overcome this, increasing the ISO value will increase the sensors sensitivity, allowing it to pick up very faint light.
Are Manual Controls Essential For Shutter Speed?
Whether you choose a Mirrorless camera or a DSLR, it’s important that your camera comes with a manual operating mode.
As you’ll be taking pictures at night, longer exposures are required. Having manual controls can extend the length of time the camera shutter is open, exposing light onto the camera sensor. For something faint (like deep sky objects) that could be up to around 90 seconds.
Use A Camera Mount
In addition to a camera and lens, you should set yourself up with a camera mount for stable picture taking. This could either be on a tripod, a star tracker or a telescope.
Tripod
Without doubt stability is the most important feature of a good tripod. Any movement, for example due to wind, could result in your photos ending up a blurry mess. So look for one that has good reviews for stability.
On the subject of stability consider getting a wireless remote shutter release for your camera. If not wirelessly, a remote trigger can be connected to your camera by using a cable to release the shutter.
This means that you can operate the camera without having to touch it, and so prevent any blur-inducing movement from your fingers!
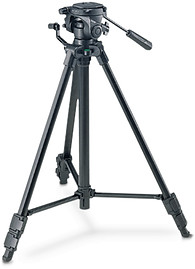
As well as requiring your tripod to be strong and sturdy, you don’t want one that’s difficult to move around, so the tripod should be of a relatively lightweight construction.
A tripod which can support the weight of camera (and possibly a tracker) is important, so make sure it has a good ‘load capacity’.
Versatility is an important aspect, and having a tripod with ‘ball head’ gives a greater range of movement and so maximum versatility for the perfect shot.
You can get some great photos of the night sky using a fixed tripod, and the main advantage of this is in reduced cost. The down side is that without incorporating a star tracker, long exposure times can cause star trails to appear in your photos.
Star trails are caused by the rotation of the Earth. For any given angle of view, or any particular lens, there is a certain amount of exposure time before the Earth will have rotated enough to start to “smear” or “trail” the stars across your image frame.
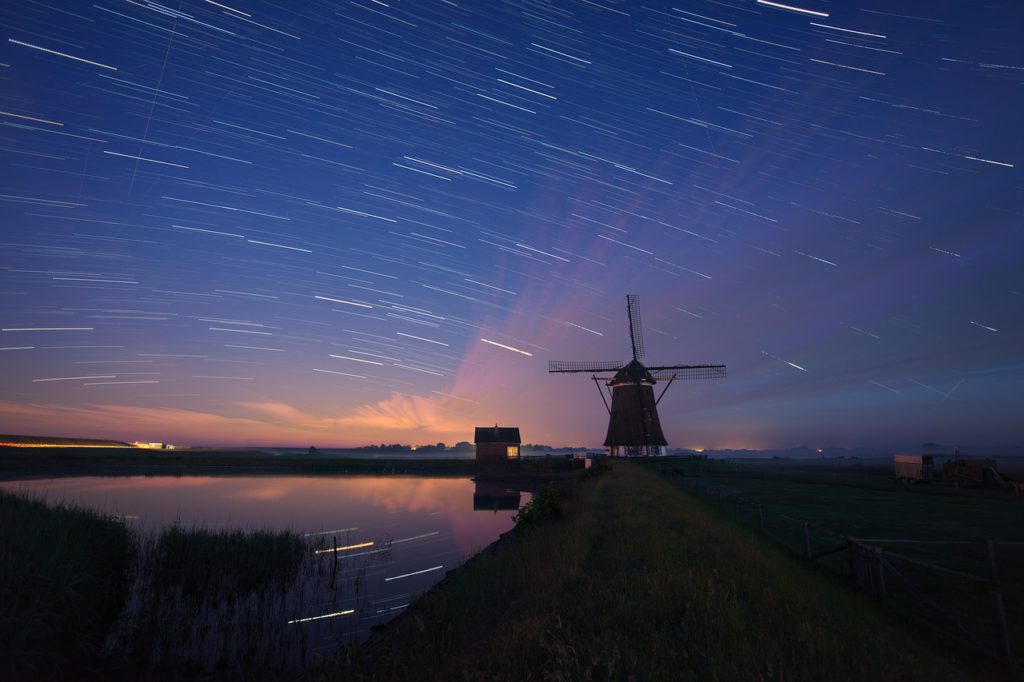
It’s possible to make some adjustments for this, but the upshot is that you get better results by adding a star tracker.
Star Tracker
These days you can buy a simple star tracker (or even an equatorial mount) that’s designed for cameras rather than telescopes. This allows a simple tripod and star tracker combination, making Astrophotography a much easier prospect.
Star trackers were invented as a way for telescopes to automatically track objects in the night sky without the need to manually move the telescope to keep the object in the eyepiece. Anyone who has tried to move a telescope for this reason will know how tricky a business that is!
Over recent years companies have produced more lightweight, portable trackers that are aimed at astrophotographers. The great benefit of these trackers is that you can take night sky photos without worry of star trails.
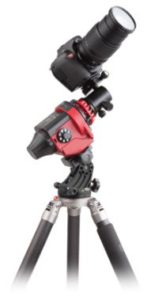
The tracker is basically a motorised head that sits between the camera and the tripod and, once properly aligned, slowly rotates in sync with the rotation of the Earth to counteract the apparent movement of the sky. This action eliminates the possibility of star trails.
Telescope
If you already own a telescope (and so probably a tripod with it) then it’s an easy process to attach a camera to the telescope by means of a simple adapter.
Attaching a DSLR or mirrorless camera to a telescope gets great results for close up planetary shots and deep sky images. There is also an increasingly popular trend in astrophotography of attaching a camera phone to a telescope on a tripod.
What Sort Of Photos Can I Take ?
The are a variety of astrophotography shots you can take using a DSLR or mirrorless camera.
This can be anything from a wide angle landscape shot of the night sky on a fixed tripod, to a shot where the camera is attached to a telescope for a more magnified photo.
Landscape Shots
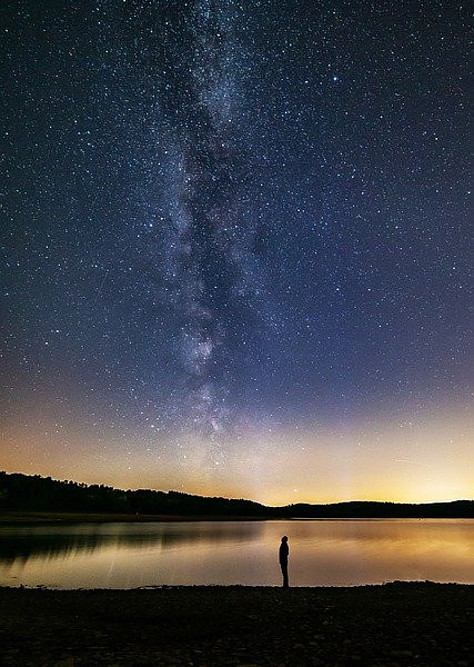
Landscape shots of the night sky are the most popular form of Astrophotography for beginners, particularly shots of the Milky Way. This is partly because you can get great results relatively easily.
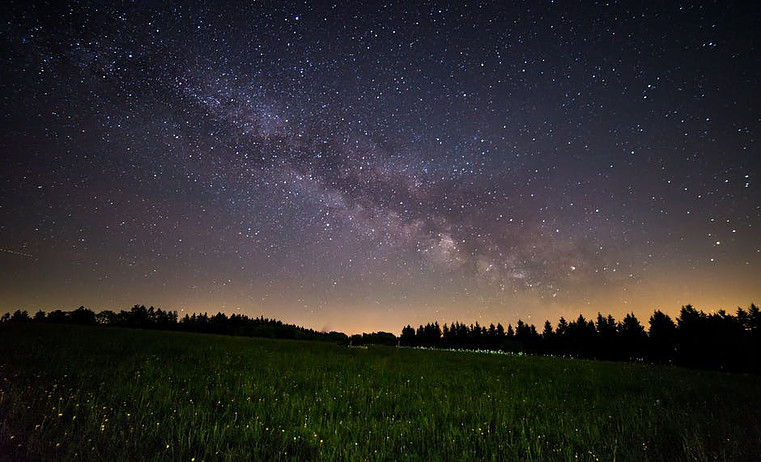
You can attach the camera directly to a tripod and get great landscape shots. Although not essential, a DSLR camera with a full frame sensor would be preferable as it will produce a wider field of view.
Set the camera to manual mode. This is important as it allows the user to independently adjust settings for aperture, ISO and exposure time.
A lens of around 14 to 20 mm focal length is recommended. This relatively short focal length will have a wide angle of view to capture a greater area of the scene.
As well as a wide angle lens, select a minimum aperture of around f/1.8 to f/2.8. This will allow your camera’s sensor to pick up as much light as possible.
As the aperture is set to the widest possible, so the shutter speed should be the longest possible.
If the camera is mounted on the tripod then around 20-30 seconds before star trails kick in. If the camera is on a star tracker the shutter speed could be set for longer, with no prospect of star trails.
Planetary Photos
Whereas taking photos of the Milky Way invariably means taking a wide angle shot, taking photos of planets can involve more choice.
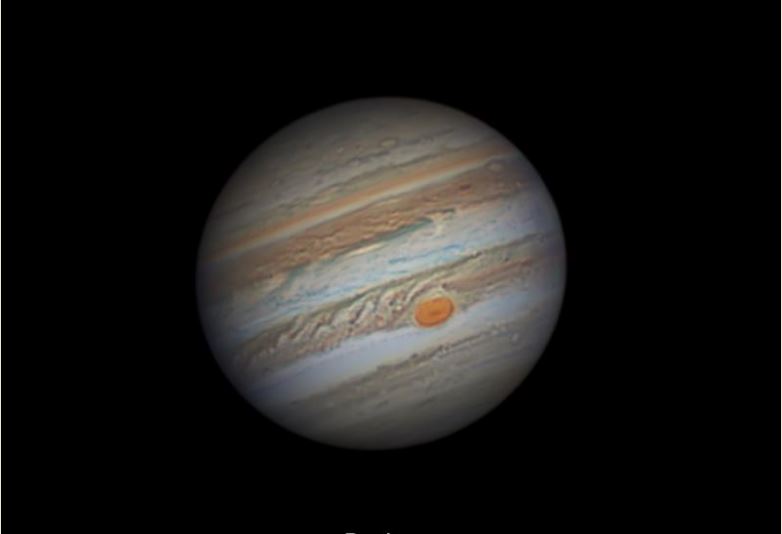
You can adopt the settings used in photographing the Milky Way for use in planetary photos. This will give you a landscape shot where planets Venus, Jupiter or Saturn will appear as brighter than the surrounding stars and Mars will show the distinctive orange tinge.
Alternatively you have a telescope with a tripod, you can simply attach the camera by means of an adapter. This can give more detailed views of the planets, especially Mars, Jupiter and Saturn. The distant gas giants of Uranus and Neptune can also be seen using a telescope/camera combination.
Taking a photo of a planet means that whereas a milky way landscape shot covers a large area of the sky, a planetary shot has a relatively small apparent size.
This means you’ll need to magnify the image to draw out detail of the subject. This can be achieved by attaching the camera to a telescope or, if the camera is attached to a tripod or star tracker, by increasing the focal length of the lens.
A mirrorless camera does a good job with planetary shots with its cropped sensor, narrower field of view and higher magnification.
Moon Shots
You can get lots of different results when taking pictures of the moon, not least because the distinct phases of the moon produce divergent photos. This makes the brightest and largest object in the night sky also one of the most satisfying to photograph.
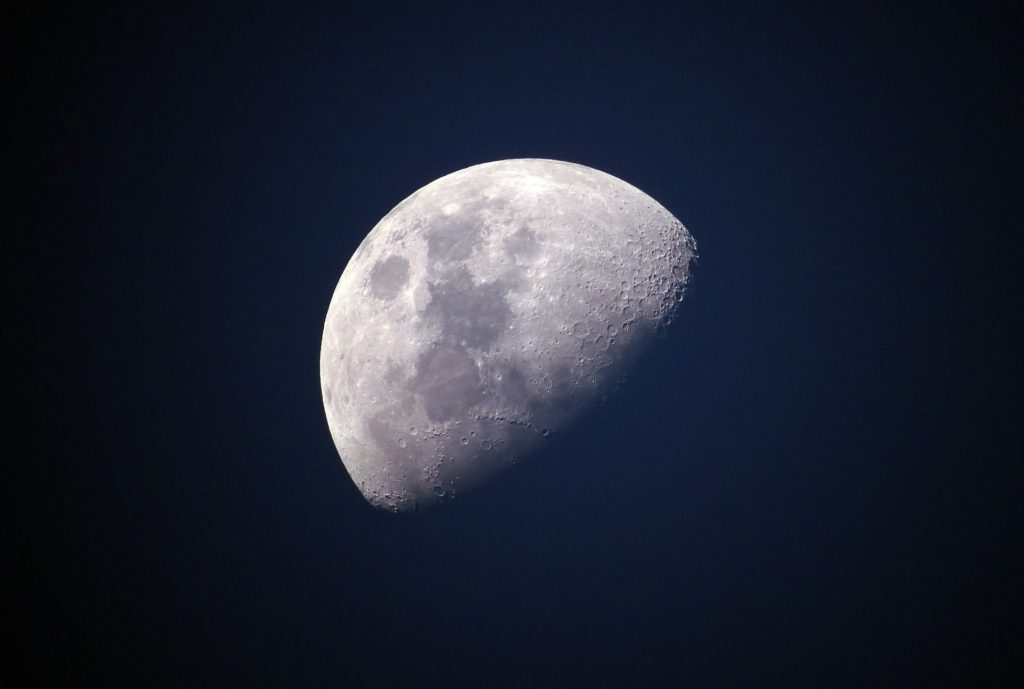
Using a DSLR or mirrorless camera on a sturdy tripod, a telephoto lens with a focal length of at least 400mm on a crop sensor camera, or 600mm on a full frame camera is recommended.
As the moon is the brightest object in the night sky, there is less of a need to gather lots of light. Therefore the camera should be in manual mode with the aperture set to f/11.
The moon travels across the night sky relatively quickly, so combined with the need for a long focal length to magnify the image, you’ll need the fastest shutter speed possible. In this case a good shutter speed to use is 1/125 of a second.
Set the ISO to 100, or as near to this that your camera will allow, and use a timer or cable release to take the photo.
Deep Sky Objects
Deep sky objects can be categorised as any object that is not a solar system object, such as the Sun, the moon or the planets. A deep sky object includes nebulae, star clusters and galaxies.
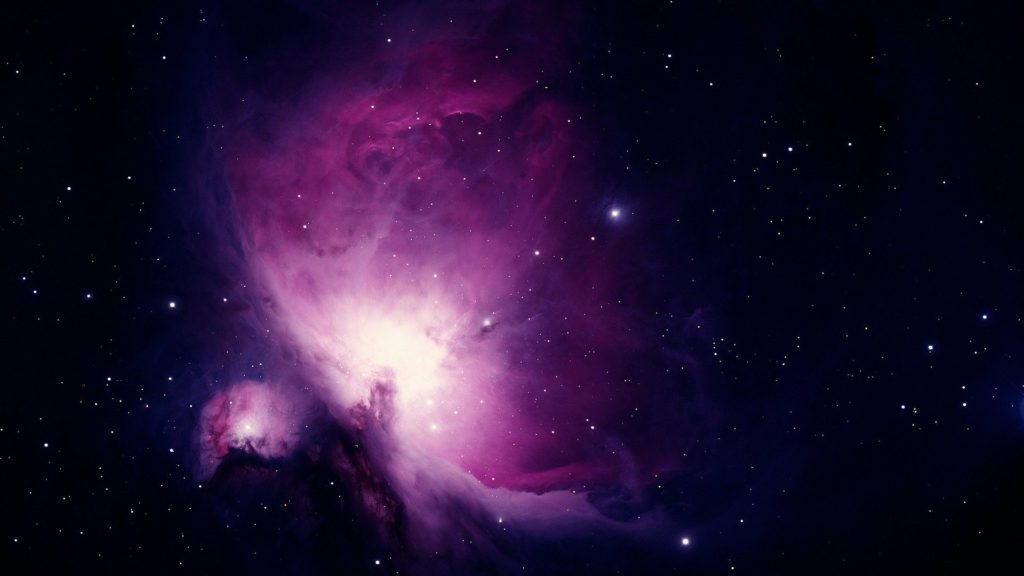
If using a camera without a telescope, the key to taking deep sky astrophotography images is to have the camera mounted on a star tracker, which itself is attached to a study tripod.
Deep sky objects are very faint, and to have this set-up means you can take tracked long exposure images to gather as much light as possible.
To capture deep sky objects, for example nebulae, you need a telephoto lens with an aperture in the region of f/2 to f/2.8 and a focal length of around 135mm.
Use an ISO setting of 1600, and the exposure time should be in the region of 60 seconds. Take the photo using a timer or remote cable shutter release.
If you have a telescope then attaching a mirrorless camera or DSLR to it has the advantage that the telescope then acts like a camera lens. This gives a greater aperture and focal length, required to reveal more fine detail of some deep sky objects.
Enjoying Astrophotography
You can start enjoying astrophotography reasonably cheaply, and a basic setup will give you some great photos. If your passion is strong enough, over time you can build your astrophotography kit to give even better results.
If you’re starting from scratch think about what specifically interests you most about astrophotography and go down that road first. Learning something about the night sky will help the process of getting to where you want to be.
You can start with a DSLR or mirrorless camera and a sturdy tripod. You may already own a telescope and this could give you a fine starting point to develop your interest.
Either way, take your time to enjoy astrophotography, and have fun taking your own shots of the night sky.
