Buying your first telescope can be exciting, but it’s easy to feel overwhelmed by all the options. Between confusing specs and countless models, how do you know what’s worth your money?
Don’t worry — this guide will help you understand what actually matters when choosing your first telescope — and how to pick the right one for your needs.
In a hurry? Here’s a quick summary of the key points:
- Decide your main goal — planetary, deep-sky, or a mix of both.
-
Choose the right type:
Refractor: Sharp, low maintenance, great for Moon and planets.
Reflector: Bigger mirrors, great for deep sky, more affordable.
Catadioptric: Combines the best of both, compact, versatile. - Focus on aperture size — it’s more important than magnification.
- Set a realistic budget that includes a mount and essential accessories.
- Start simple, observe often, and upgrade once you gain experience.
If you’re completely new to stargazing, it’s worth starting with a full astronomy for beginners guide to understand the basics before choosing your first telescope.
1. What Do You Want To Observe?
Before buying a telescope, think about what excites you most in the night sky:
- The Moon: Perfect for beginners. Even a small telescope can reveal craters, mountains, and maria.
- Planets: Venus, Jupiter, Saturn, and Mars are all visible, but some require higher magnification for detailed views.
- Deep-Sky Objects: Galaxies, nebulae, and star clusters often need larger apertures and darker skies.
Having a goal in mind helps narrow down your options and ensures your telescope delivers the kind of views that keep you hooked.
The Moon
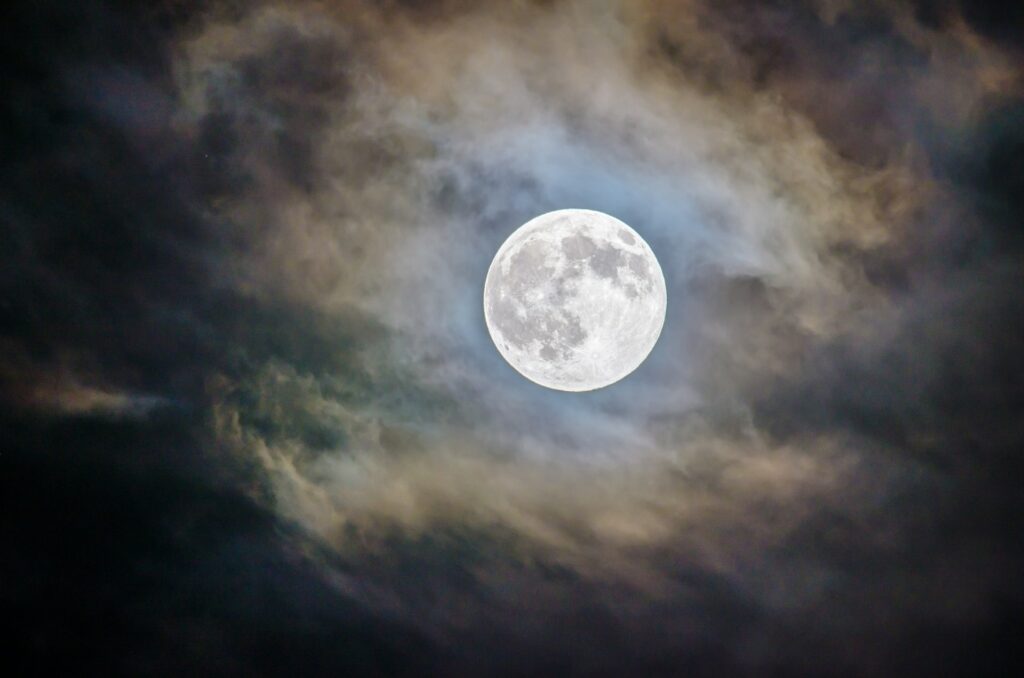
The Moon is a great place to start when observing the night sky.
When viewing through a telescope it’s common for beginners to think that they’ll get the best experience from observing a Full Moon.
This really is not the case because the Sun is shining almost directly on the surface, which means the lack of shadow on craters and mountain ranges can make it look a bit one dimensional.
In my experience (especially if it’s high in the sky in winter) looking at a Full Moon through a telescope can be slightly uncomfortable viewing.
The dazzle is such that you wish it could be toned down a bit. Thankfully this can be done through the use of a Moon filter.
When not at Full Moon, anyone who has looked up at it will have noticed the line of darkness that runs across from one side to the other.
This is called “The Terminator” and it’s the Moon’s equivalent to the separation between day and night on Earth.
The Moon’s much slower rate of rotation means that it takes longer for The Terminator to pass across the surface, and it’s these phases that produce the best time to view the Moon through a telescope.

By observing through a telescope, the region around and along The Terminator can be an awesome thing to see.
The light from the Sun hits the Moon from the side, giving shadow to mountain ranges, craters and other features. This gives the Moon a less flat, more rugged look and a wonderful viewing experience.
The first time I saw the Moon through a telescope as a kid, I was amazed and mesmerised in equal measure! There’s something about seeing for yourself the Moon’s craters, mountain ranges and other features, that’s hard to describe.
In fact there’s a rather moving (well I thought so!) three minute video that does the job brilliantly.
It shows various people in Los Angeles being shown the Moon through a telescope and their amazed reactions. Makes you want to get your scope out! You can view it below.
The Planets
The three most popular planets to view are Mars, Saturn and Jupiter (Two in particular Jupiter and Saturn with surprising detail)
Mars
Mars is a popular choice for wanting to aim a newly acquired telescope at. (Martians and all that!).
As Mars is the second smallest planet after Mercury, and only around half the size of the Earth, it looks rather small through most telescopes.
Mars is the only planet where surface features can be observed, and through a telescope it’s possible to see the Polar ice cap and the darker geological features.
Occasionally you may observe huge dust storms taking place, and some can cover the entire planet.

Mars’ orange-red appearance is due to Iron Oxide (or rust) particles in the soil. You can even notice this colour if you spot Mars with the naked eye. The twinkling planet can be seen with an orange-red tinge.
Jupiter
Jupiter is the largest planet in the Solar System, and one of the brightest objects in the night sky, which makes it the easiest to observe.
Jupiter is huge. It has a diameter more than 11 times that of Earth. It is so big you could fit over 1,300 Earths inside it.

Jupiter’s Size Compared To Earth
Jupiter is a great sight through a telescope. The first thing to notice are the stripes of colour that run around the whole planet.
The light coloured bands are created as gas in Jupiter’s atmosphere is rising upward. The darker bands are regions where the gas is sinking downward.
Even with a small telescope you should be able to see Jupiter’s Great Red Spot. It’s a huge storm over twice the size of the Earth, which has been raging on the planet for hundreds of years.
You can also see four of Jupiter’s largest moons around the planet. They appear to be small dots of light through a small telescope, and its fascinating to watch their movement around the planet.
Seeing the position of these four Moons on one night will be significantly different to the next night. In fact, you can notice a different position in as little as an hour.
Saturn
When you first see Saturn through a telescope, you can look at it for ages, but it still feels difficult to accept that what you’re looking at is real!
For me, along with the moon, it’s one of the most mesmerising things you can view with a scope.
Viewing Saturn through a telescope for the first time is what has got many a casual observer hooked on astronomy.

Saturn is the furthest planet that most people can see with the naked eye.
Even so, the rings of Saturn, that give the planet it’s spectacular 3D like appearance, are clearly visible even through a small telescope.
It’s also possible to spot one of Saturn’s moons, Titan, with a small scope.
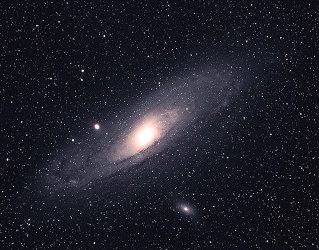
Deep Sky Objects
You may also be interested in Deep Sky Objects. This refers to objects outside our Solar System such as Star Clusters, Nebulae and Galaxies. A reflector telescope is usually regarded as the best type for deep sky viewing.
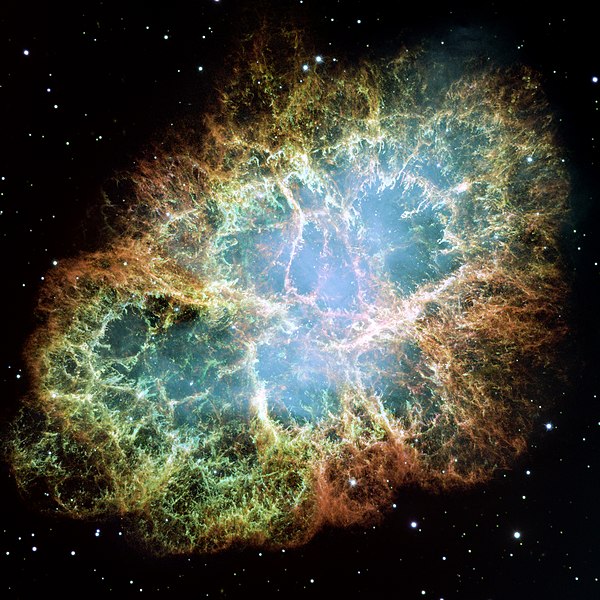
The Crab Nebula
An important aspect to consider in viewing deep sky objects is the increased reliance on dark skies. Deep sky objects are so faint the many amateur enthusiasts will look to travel away from light polluted urban areas. In which case a relatively portable type of telescope should be considered.
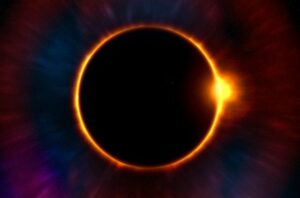
Solar Astronomy
First things first. If you are interested in Solar Astronomy (i.e. looking at the Sun) it is imperative that you don’t, I repeat, DO NOT!! point a telescope or look directly at the Sun.
Without taking proper safety precautions looking directly at the Sun can cause permanent eye damage, even blindness.
The good news is that there are Solar Telescopes which you can buy ready to use or you can upgrade an existing Astronomical telescope with special solar filters.
For now Solar Astronomy is another post for another time.
2. Choosing Your Telescope Type
When thinking about how to buy a telescope you may wonder which one is best for a particular type of viewing, or as a general all-rounder.
There are three main types to consider:
Refractor Telescopes
- Use lenses to bend light.
- Sharp images, great for the Moon and planets.
- Low maintenance, sturdy design.
- Slightly more expensive for larger sizes, less suited for faint deep sky objects.
Reflector Telescopes
- Use mirrors to gather light.
- Excellent for deep sky objects and wide fields of view.
- Generally more affordable, compact, but may require occasional alignment (collimation).
Catadioptric Telescopes
- Combine lenses and mirrors.
- Very versatile, portable, and good for astrophotography.
- More expensive, less sharp than top-quality refractors, heavier than reflectors.
If you’re still unsure which to choose, remember: refractors are sharp and simple, reflectors show more faint objects, and catadioptrics sit nicely in between. See our full breakdown of reflector vs refractor telescopes for beginners for a more detailed look.
Refractor Telescope
A refractor telescope is the kind of scope which was first used for astronomical observations in the early 1600s.
It looks like the stereotypical telescope with its long tube, a large lens at the front and an eyepiece at the back. It’s the mental image we get when we think of what a telescope looks like.

Refractor Telescope
The large lens at the front bends (or refracts) the light going through it. The lens works in a similar way to eyeglasses, but whereas with glasses it makes things less blurry, in a telescope it makes faraway things seem closer.
The large lens (called the objective lens) focuses the light coming into the tube to a focal point at the back where the image is formed.
The eyepiece lens then acts as a magnifying glass. It takes the light from the focal point and spreads it out across the retina of your eye which makes the object seem closer than it really is.

This type of telescope is often regarded to be the best for viewing the Moon and planets due to the sharpness of the image of bright objects, although others will do a fine job.
A refractor telescope’s relatively simple, but sturdy design, makes it easier to use and more reliable. It’s less likely that dust can get in and need to cleaned off the lenses, as these are fixed within a sealed tube.
Refractors are also more suitable for enthusiasts who would rather have an “out of the box” instrument that requires little tinkering with.
On the downside more powerful refractors have a larger, thicker lens. As the lens of a refractor gets thicker it reduces the amount of light entering the telescope.
This means it’s not as good for observing deep sky objects.
Even though you can get a sharper image, which is great for Moon and planet observing, refractors tend to be more expensive than reflectors (more on that type next) of a similar specification.
This is because the high quality lenses used in refractors are more expensive to produce.
It also weighs more and has a longer tube than a reflector of a similar spec. This may potentially create problems for storage and portability.
Advantages
- Simple, reliable, sturdy design.
- Sharp image, best for observing Moon and Planets
- Good for “get straight to it” observing
- Less maintenance
Disadvantages
- Relatively more expensive
- Less suitable for observing deep sky objects
- Potentially more difficult for storage and portability
Reflector Telescope
As already mentioned, the refractor telescope has been around since the early 1600s, and one weakness of them was an optical error called chromatic abberation.
In 1668 Sir Isaac Newton found that the solution to this problem was to get rid of the lens completely and replace it with a polished mirror.
The Newtonian Reflector, as it was named, is still the best known and most popular reflector today.

Newtonian Reflector Telescope
Whereas a Refractor uses a lens, the Newtonian reflector telescope utilises a large primary mirror at the back of the scope.
The light bounces off the dish shaped (concave) primary mirror, and onto a flat auxiliary mirror placed near the front of the scope at a 45 degree angle.
This then sends the image to the side mounted eyepiece where it is magnified.

The use of a large primary mirror instead of a lens inside the telescope tube means that reflector telescopes tend to be cheaper than refractor telescopes of a comparable size.
The large light collecting area of a reflector also means that although they can do a good job with Moon and Planet observing, they come into their own for Deep Sky observations.
The design of a reflector means that the eyepiece is further toward the front of the barrel and not at the very back. This makes for more comfortable viewing in most circumstances.
Also, compared to a refractor, reflector telescopes have a more manageable tube.
Although wider (to gather more light), they can be notably shorter which may make them easier to transport to a darker sky area.
On the downside, reflector scopes generally do require more maintenance.
The tube is open to the outside which means that the mirror surface may require cleaning, as dust is more likely to gather over time.
Also, a reflectors mirrors may get out of alignment with each other and may require occasional adjustment (called collimation) which can be done in a few minutes.
Advantages
- Cheaper than refractors of comparable size
- Good for Deep Sky Object observations
- Eyepiece at more convenient height
- More manageable
Disadvantages
- Not as rugged a design
- Requires more maintenance
- Not the best for Moon and Planet viewing
Catadioptric Telescope
While both reflector and refractor scopes have been around for hundreds of years, catadioptric telescopes are a relatively recent addition.
A catadioptric telescope’s name refers to a curved mirror (Catoptrics) and a lens (Dioptrics), which are both used in this design.

Catadioptric Telescope
The use of mirror and lens in a Catadioptric telescope offers the best of both worlds in regard to the optical features of the other two types.
It also corrects aberrations which can be present in both reflectors and refractors. This makes a catadioptric a great all-rounder.
The catadioptric telescopes combination of lenses and mirrors enables “folding” of the light within the barrel which allows for a shorter telescope.
This makes the catadioptric more portable and easier to store. Also, just like refractors, a catadioptric telescopes tube is sealed so that dirt and dust are largely excluded.
On the downside Catadioptric telescopes tend to be more expensive than a Newtonian reflector with a similar aperture and they offer less contrast than a refractor.
Advantages
- A great all-rounder. Most versatile type of telescope.
- Combines optical advantages of refractors and reflectors
- Low level of maintenance required
- Good for astro-photography
Disadvantages
- Tend to be more expensive than reflectors
- Offers less sharpness than equivalent refractors
- Heavy for its size
Not sure which design suits you best? If you love crisp planetary views, our guide to the best refractor telescopes for beginners is a great place to start.
If faint galaxies and star clusters are what excite you most, see our roundup ofthe best reflector telescopes for beginners to find your ideal match.
3. Aperture, Focal Length & Magnification
It’s easy to get distracted by big magnification numbers — but aperture (the width of the lens or mirror) is what really matters.
- Aperture: The most important feature. Bigger = more light = more detail.
- Focal Length: Longer focal length = larger image.
- Magnification: Don’t be fooled—high magnification doesn’t always mean better views. A scope with too much magnification can produce blurry images.
Rule of thumb: Maximum useful magnification is roughly twice the aperture in millimetres. For example, a 100mm telescope works well up to 200x magnification.
A smaller, good-quality telescope will always outperform a cheap one that promises extreme magnification.
Aperture
Its often the case that when people wonder about how to buy a telescope, one of the first things they think is to buy one with the largest magnification possible, when it’s actually down the list of important factors.
The most important function of all telescopes is to collect light. Depending on what type of scope, light is collected through the use of a primary mirror (Reflector) or objective lens (Refractor).
The diameter of the primary mirror or objective lens is known as the aperture, and this is specified in either inches or millimetres.


The larger the aperture the more light the mirror or lens gathers, and the greater the detail and clarity of the image there will be.
Essentially the larger the aperture the deeper into space you’ll be able to see. Aperture is the single most important optical factor when choosing a scope.
Focal Length
Focal length is the calculation of the optical distance, usually in millimetres, from the objective lens (or primary mirror) of the telescope to the point where the light rays converge to form a sharp image.

Generally the longer the focal length of a telescope the larger the image, and in most cases the focal length of a telescope is roughly equal to the length of the tube.
A catadioptric telescope though is different in that it uses both lens and mirror to reflect the light a few times before it reaches the eyepiece.
This has the effect of a large focal length with a relatively short tube.
Magnification
Magnification (or power, as it’s often called) is the amount that a telescope enlarges the object viewed.
Magnification isn’t just about bigger numbers — understanding how telescope eyepiece magnification works is key to getting the best results.
A quick way to calculate the magnification of any given telescope is to divide the focal length of the telescope by the focal length of the eyepiece.
The focal length of the telescope should be displayed on the telescope nameplate. You can find the focal length of the eyepiece labelled on it’s side.
So, for example if a telescope has a focal length of 800mm and the eyepiece has a focal length of 10mm, the calculation would be 800 divided by 10 = 80. Therefore the magnification in this example would be 80x
Magnification is certainly not the “be all and end all”, and when considering how to buy a telescope it’s a mistake to choose one just based on this.
The potential problem with magnification is that too much of it reduces the quality of the image significantly.
A faint object like a nebula can become too dim to see and a bright object such as the moon can become blurry in a similar way to a magnified photograph.
So how do you know what amount of magnification is OK?
Well, as a guide, a telescope’s maximum useful magnification is twice the telescopes aperture in millimetres (or 50 times it’s aperture in inches)
So for example if a telescope has a lens diameter of 100 millimetres (the aperture) then the maximum meaningful magnification is 200x.
Many observers have power (or magnification) set lower, which they trade off for brighter, crisper images with a wider field of view.
4. Choosing The Right Mount
A steady mount is just as important as good optics. There are three main types:
- Alt-Azimuth Mount: Simple up-down and left-right movement. Great for beginners, not ideal for long-exposure astrophotography.
- Equatorial Mount: Tracks the stars, perfect for astrophotography. Needs initial alignment with the celestial pole.
- Go-To Mount: Computer-guided, automatically points and tracks objects. Convenient, but less hands-on learning.
Your choice depends on how hands-on you want your experience to be. Manual mounts teach you the sky; Go-To systems make finding objects effortless.
Alt-Azimuth Mount
Of the two types of mount the Alt-Azimuth is the simplest mechanically. It has two axes of rotation, a vertical axis (Altitude) and a horizontal axis (Azimuth).

Although the Alt-Azimuth is the easiest to use it has the disadvantage that it is not built to follow the movement of the stars.
As the movement of the telescope on this mount is either up-down (Altitude) or left-right (Azimuth), tracking an object produces a zigzag motion which makes this type of mount virtually useless for astro-photography.
Even so a telescope with an Alt-Azimeth mount is a good choice for someone just starting out who wants to keep things uncomplicated, as they are cheap and simple to use.
Equatorial Mount
The Equatorial mount is the more complicated of the two, but offers far superior tracking abilities.
In fact the Equatorial mount is like a tilted version of the Alt-Azimuth but the two axis have different names (Altitude axis becomes Declination axis and Azimuth axis becomes Right Ascension).

To set up the Equatorial mount it needs to be lined up so that the Polar axis is aligned to the local celestial pole.
In the northern hemisphere, where I live, the northern celestial pole (NCP) is easy to locate as it’s marked by the star Polaris.
Once this is done the mount can track celestial objects by just turning one axis, as the motion of the mount mimics that of the stars.
It’s also the kind of mount that can be more easily motorised which make it great for astro-photography and go-to telescopes.
If you’re interested in capturing images of the night sky, your telescope choice will also affect your ability to get started with astrophotography for beginners.
Go-To Telescopes
Go-to scopes are not really a different type of telescope but are more to do with the mount.
Go-to telescopes come with a built in computer and handset which are connected to both axis of a motorised Equatorial mount.
The term “go-to” relates to the ability of the software to point to, and track automatically, a specific object that the user selects from a database.
These are great if you consider manually finding celestial objects a hassle.
The downside is that not only are non “go-to” telescopes of a comparable spec cheaper, you could miss out on familiarizing yourself around the night sky.
Still, as “go-to” drives are becoming cheaper they are becoming an increasingly popular scope to buy.
5. Where Will You Be Stargazing?
Where you observe will dramatically affect what you can see:
- City or Suburban Areas: Great for Moon and planets, but light pollution can limit deep sky observations.
- Rural/Dark Skies: Ideal for nebulae, galaxies, and star clusters. Portable telescopes are a plus if you plan to travel to darker skies.
- Backyard Setup: Convenience matters — if your telescope is easy to carry outside, you’ll use it more often.
If you live in the countryside, through the naked eye it’s entirely possible you could see more than 10 times as many stars in the sky, than if you live in a city.
You are also much more likely to be able to see the arc of the Milky Way overhead.

The Milky Way
Even though there is nearly always some degree of light pollution, if you live outside of urban areas, with dark skies, then generally you’re good to go for all types of observing.
Light pollution is an increasing problem for amateur astronomers, especially those into deep sky objects. Even so, if you do live in an urban area you can still get great views of the Moon and planets.
Here’s a great example. If you haven’t seen it yet, take a look at the video of people looking at the Moon through a telescope in Los Angeles. It’s called ‘A New View Of The Moon’ further up the page and its well worth taking a look.
6. Storage and Portability
Storage and portability is something that can be overlooked in all the excitement of purchasing a scope. (Ahem..that’ll be me!)
- Consider the weight and size if you plan to transport it for dark-sky observing trips. An optically superb but massive telescope will be useless if you can’t carry it outside!
- Think about how you are going to store it properly (preferably in a dust and moisture free environment). Especially as there is a chance you may not use it for a while.
7. Invest in Quality
A cheap, plastic “600x power” telescope is tempting, but it’ll likely disappoint. Invest in solid optics and a sturdy mount. A good beginner telescope will grow with you, providing years of rewarding stargazing.
Alongside your quality telescope, a few essential telescope accessories for beginners can also make a huge difference to your observing experience.
Final Thoughts
Buying a telescope isn’t about getting the biggest or most expensive one — it’s about finding a reliable instrument that helps you enjoy the night sky.
Start simple, learn how to use it, and explore what interests you most. Once you’re comfortable, you can always upgrade with accessories or a larger scope.
The best telescope is the one you’ll actually use.
What to Read Next
Now that you know how to choose a telescope, here’s how to build your full setup:
- Start with our Astronomy for Beginners guide
- Explore the best telescopes for beginners
- Upgrade your setup with essential telescope accessories
- Learn how magnification really works in our eyepiece guide
Frequently Asked Questions (FAQ)
1. What is the best telescope type for beginners?
It depends on your interests. Refractors are great for crisp views of the Moon and planets, while reflectors excel at showing faint deep-sky objects. Catadioptrics offer a balance of both.
2. What size telescope should I start with?
An aperture of 80mm to 130mm is ideal for beginners. It gathers enough light for impressive views but remains portable and easy to use.
3. Do I need a computerized (Go-To) telescope?
Not necessarily. Manual mounts are simpler and cheaper, helping you learn the sky. Go-To systems are great for convenience once you know the basics.
4. Are tabletop telescopes good for beginners?
Yes! They’re compact, affordable, and perfect for casual observing — especially if you don’t have much space or want something easy to set up.
5. Can I use a telescope in the city?
Absolutely. You’ll still get excellent views of the Moon, Jupiter, and Saturn. For fainter objects, darker skies will make a big difference.