It’s often the case that when you buy a telescope you have all the kit you need as part of the deal. Over time though, you may feel that you want to invest in telescope accessories to upgrade, replace or generally get more from your observing.
There are a whole range of accessories which can enhance your viewing pleasure. So, with that in mind, here’s a look at some of the most popular telescope accessories you can buy.
Barlow Lenses
The Barlow lens was invented by Peter Barlow (1776-1862) an English mathematician and physicist. The great thing about the Barlow lens is that it’s a very cost-effective way to increase the magnification. It’s one of the most popular accessories and every budding amateur astronomy should own one.
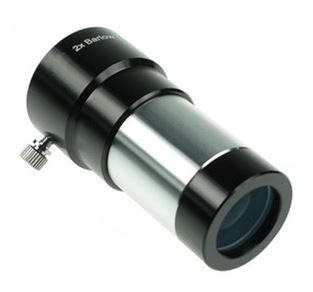
The Barlow lens is a concave lens in a tube which sits between the telescope and the eyepiece and is very easy to fit. It increases the power (or magnification) of the scope by, in effect, increasing the telescopes focal length.
The most common Barlow will give you a 2x magnification although you can get 3x Barlows. This effectively doubles or even triples the number of eyepieces you own.
If you don’t have a relatively large scope (say less than 8″) it would probably be wise to enjoy the benefits of a 2x Barlow lens. Smaller telescopes don’t have as much light gathering ability so a more powerful Barlow lens (say 3x) might produce disappointingly dim results.
One thing to note if buying a Barlow lens is to make sure you get one which fits the tube of your eyepiece. Happily, this isn’t a minefield as there are two standard sizes, 1.25 and 2 inches. You’ve just got to pick the right one for you.
Eyepieces
Buying a good quality eyepiece can markedly improve your viewing experience. When you buy a telescope there’s a fair chance that it comes with a budget eyepiece or two. This is perfectly fine when you’re starting out and have bought a decent quality telescope, but in time you may want to upgrade your eyepiece.
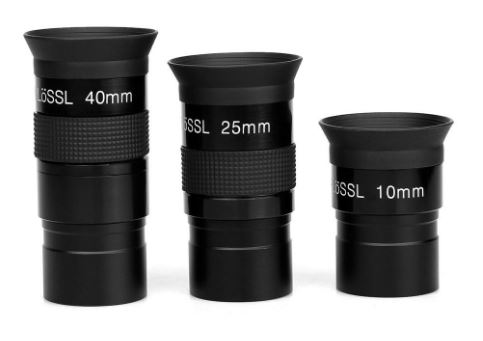
The effect of a good quality eyepiece is often underestimated. A telescope owner can be very surprised at the difference it can make, almost to the point where it feels like they’ve got a new scope!
Basically, the eyepiece determines the magnification and field of view of a telescope. They come in a whole range of focal lengths and designs, and different eyepieces can be used to view different objects. For example, observing deep sky objects such as Nebulae, Star Clusters or Galaxies would be best viewed at lower magnifications.
As these objects are fainter and can appear quite large, a lower magnification eyepiece would mean a wider field of view, and a brighter image. The planets are brighter and often smaller in image than deep sky objects and so a higher magnification is preferable.
An important point to remember if you already have a Barlow lens and you’re looking to buy an additional eyepiece is to avoid duplication.
For example, if you have a 28mm eyepiece now, and also a 2x magnification Barlow lens, essentially you have an extra 14mm eyepiece. So, to then go out and buy a 14mm eyepiece at some point in the future wouldn’t make sense, as you would only be duplicating magnifications.
The vast majority of eyepieces, just like the Barlow Lens, come in the 1.25 inch or the 2-inch category.
Finderscopes/Red Dot Finders
Finderscopes/Red Dot Finders are a must have for beginners and experienced stargazers alike. They often come as part of the deal and their purpose is to aim the telescope at the object of interest.
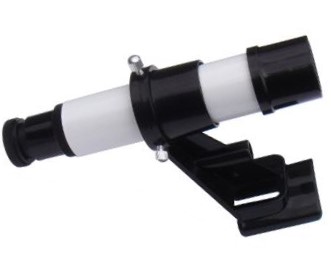
A finderscope has a zero (or a much smaller) magnification which results in a larger field of view. This means it is much easier to locate an object of interest.
Once you have it lined up in the finderscope, you look through the main telescope for more detail. Most finderscopes have crosshairs, so that when you point at a target it gives more accuracy.
Increasingly used these days are Red Dot Finders. These have a coated glass window to superimpose the image of a small red dot onto the night sky. The red dot acts as a crosshair and is powered by a small battery.
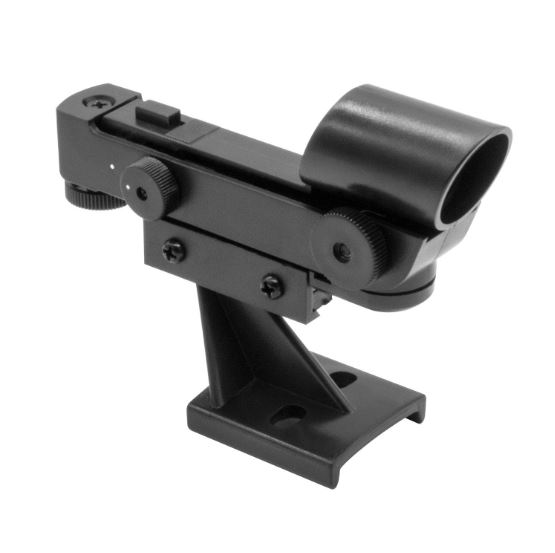
Both types are easily fitted to the telescope along the same line of sight but must be aligned properly with the main telescope before use, which is a simple process.
Diagonals
If you own a refractor (or possibly a catadioptric telescope) one of the most useful telescope accessories to have is a Diagonal (also called Star Diagonal).
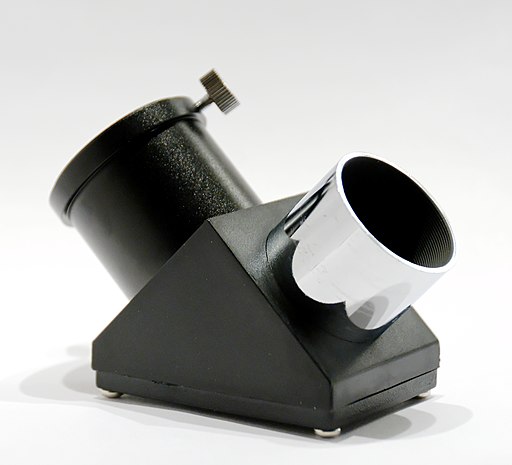
Pointing a refractor at the night sky means that with the eyepiece located at the end of the scope, the higher in the sky you point it, the lower to the ground the eyepiece is. This can make observing uncomfortable to the point where you’re virtually bent over double!
This is where diagonals are a great addition. They fit nicely over the end of the tube and deflect the light by 90 degrees. This makes for more comfortable and convenient viewing when the telescope is pointed high in the sky.

The diagonal come in two varieties, mirror and prism.
Mirror Diagonal
The advantage of the older form of the mirror diagonal is that it tends to be cheaper to produce and therefore cheaper to buy. It also doesn’t suffer from any colour aberrations. On the downside, the older type tends to have a reduced contrast.
This disadvantage can be largely eradicated if one of the newer type of mirror diagonal is chosen, called the dielectric mirror diagonal. This does come at a cost though, as the multiple thin layers of dielectric material incorporated in the mirror make it more expensive than the older type.
Prism Diagonal
The prism diagonal has the advantage over ordinary mirror diagonals in that there is no slight scattering of light. It can gather more light than a mirror and so has a higher image contrast. On the downside, poor quality prisms are prone to chromatic aberration with short focal length scopes, and prisms generally cost more than the mirror diagonals.
Telescopes with a short focal length tend to function better with mirror diagonals. A prism diagonal is the type best suited to telescopes with a longer focal length.
As with other accessories already highlighted, pick either 1.25 or 2 inches to fit your scope.
Filters

When you buy a telescope you quite often get some budget accessories with it, like a couple of eyepieces and possibly a Barlow lens. After a while you will probably want to enhance your observing and a great way to do this is by buying filters.
It doesn’t seem right somehow that when having as much light as possible enter your scope is such a good thing, that you would want to go and filter it! It seems kind of counter intuitive.
The truth is, there are some wavelengths of light that add no detail to an object. Removing them by filter means the object is much sharper, and you’re left with a cleaner view.
Since different celestial objects emit (or reflect) different wavelengths of light, there are many types of different filters, and they can radically improve your visual experience.
So how do filters work?
It’s all to do with photoreceptors. These are special cells in the retina of the eye which respond to different wavelengths of light (red, green and blue) and convert them into signals which are sent to the brain. It’s the photoreceptors that are responsible for our perception of colour.
A filter works by controlling the type of light our eyes see by either blocking some wavelengths while allowing others through, or by reducing light across the spectrum equally.
This means different filters can have different uses, such as to improve contrast or to reduce glare. They can be used for improved viewing of the Moon, planets and deep sky objects and are absolutely vital when viewing the Sun.
Here are some examples…
Moon Filters
Polarizing Filter & Neutral Density Filter
The Moon is the brightest object in the night sky, and at times it can be a bit too bright for comfort. Reducing the glare by means of a filter can also tease out more detail than you may ordinarily see.
There are two types of filters for reducing glare, a polarizing filter and a neutral density filter. They are both similar in that they reduce light across the spectrum equally while leaving colours transmitted to the eyes unaltered.
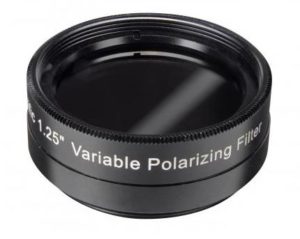
The difference between polarizing and neutral density filter is that the polarizing filter is adjustable.
You can manually adjust the filter strength because polarizing filters have two polarizing surfaces. By turning a thumbscrew, you can vary the angle between them and choose the amount of filtration you require.
Neutral density filters do the same job, but they are not adjustable which invariably means they are cheaper to buy.
Planet Filters
Colour Filter
There are a whole range of colour filters designed for observing the planets (although some can also be used for the Moon).
Colour filters are very useful when observing planets as each planet has a unique composition and atmosphere. This allows for many different colour filters to either increase contrast, and/or help surface details stand out.
Varying grades of yellow, red, green and blue filters can be used. Depending on what filter you use for which planet, it can greatly improve your ability to discern small details.
For example, one particular colour filter may be good for viewing the polar ice caps of Mars, while another may be good for viewing Jupiter’s Great Red Spot.
Colour filters for astronomical observing use the Wratten numbering system. This is named after the man who first invented colour photographic filters, Frederick Wratten (1840-1926). This system gives a number to each colour filter, for example #21 for Orange or #47 for Violet.
So which filter is best for which planet?
The list below shows the most effective filter for the Moon or particular planets.
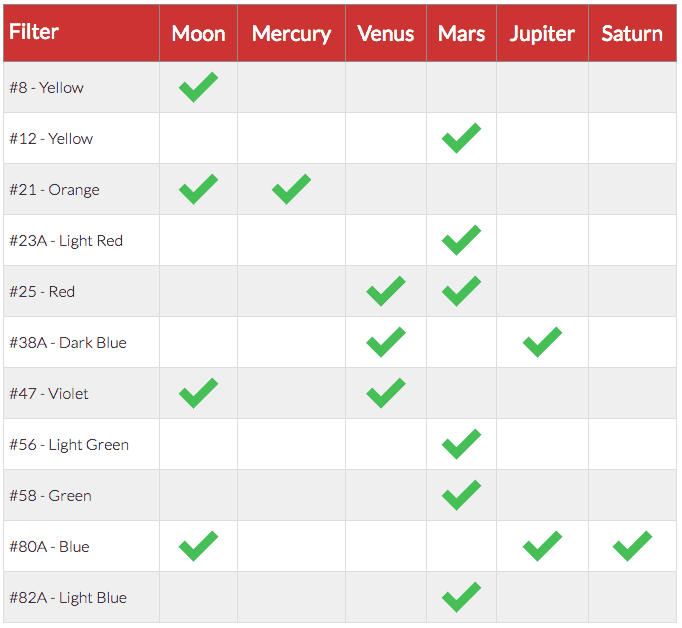
It’s worth noting that the smaller the aperture of your scope, the lighter colour of filter you should use. So as a guide, darker coloured filters function better with scopes of 6-8 inch apertures or larger.
Planetary sets are commonly offered by manufactures consisting of varying grades of red, yellow, green and blue filters. This should be considered as an option if you’re planning on making filters part of your setup as they tend to be better value.
Deep Sky Filters
Light Pollution Reduction Filter (LPR) & Narrowband Filter
If observing deep sky objects is your thing, you live in an urban area and you only ever buy one filter for your telescope, an LPR filter is probably the one for you.
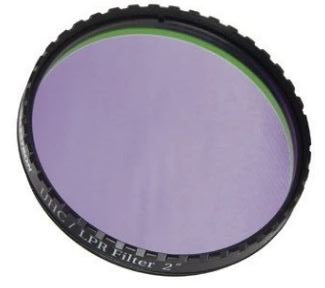
Even though the elimination of all light pollution is impossible, an LPR filter does a good job of reducing the effects of the most common types of street lighting illumination.
Narrowband filters are often regarded as the best all round filter for deep sky observations. This distinction is more relevant if you happen to live in a rural area, because the narrowband filter is best suited to dark skies with good seeing conditions.
A narrowband filter blocks out all light apart from a small range of wavelengths. This can have a noticeable effect on reducing sky glow and darkening the sky. When observing Nebulae, what may have been faint or unspectacular before can suddenly come to life with the use of a narrowband filter.
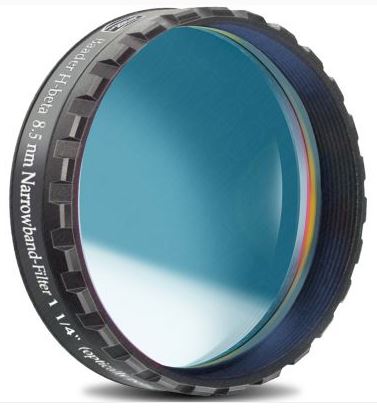
Telescope filters are usually threaded and screw into the barrel of your eyepiece. This makes them very easy to use. It’s also completely different to how solar filters attach to your scope, and we’ll look at them next.
Solar Filters
White Light Filter & Hydrogen-Alpha Filter
Solar filters differ from other filters in that they don’t attach to the eyepiece. (If you ever come across one that says it does avoid it like the plague!). The reason for this is that the telescope will concentrate and focus too much sunlight before it reaches the filter. This will in all likelihood damage the filter and your eyes!
Serious Warning! Please don’t look through a telescope (or it’s finderscope!) at the Sun without the correct filter. It can cause serious eye damage and even permanent blindness.
Right, that’s the essential but unnerving stuff done!
It’s also important to know that if you’re interested in Solar astronomy, there are completely safe filters for you to use that give great results. The correct solar filter for your telescope is one that positions over the front of the scope, and it must completely cover the aperture to be effective.
There are two types of filters to use for Solar observing, a White Light filter and Hydrogen Alpha filter. Both types vastly reduce the amount of light passing through them to safely observable levels, to approximately 1000th of one percent.
White Light Filters are, in effect, extremely dark neutral density filters. This enables an observer to view one of the outer layers of the Sun called the Photosphere. Surface features such as Sunspots and Granulation (convection currents of Plasma) can be seen.
White light filters are either made of thin sheets of film such as Mylar which gives a blueish colour, or from glass coated with metallic layers. Most white light filters produce a white image of the Sun, although some produce a yellow orange colour to more closely match the colour that people expect to see.
The other filter to use is called a Hydrogen-Alpha filter, which is essentially a Narrowband Filter
Roughly three quarters of the Sun’s mass contains Hydrogen, and this filter transmits only one particular wavelength, the light emitted by Hydrogen atoms at a certain temperature. This comes from the Sun’s Chromosphere, a layer above the Photoshere, where the temperature more than trebles from 6000*c to approximately 20000*c. This big increase in temperature results in the Hydrogen atoms being emitted as a reddish colour.
A hydrogen-Alpha filter enables an observer to see several features of the Sun which emanate from the Chromosphere including solar prominences.
Collimators
If you own a Newtonian Reflector then over time you may find that the primary and secondary mirrors, due to the odd knock or bump, become misaligned. In which case the optical components need to be properly aligned with one another. This process is called collimation.
To make the process easier, there is a popular tool called a Laser Collimator you can use when collimating your telescope. This greatly helps with the process and gives much quicker results.
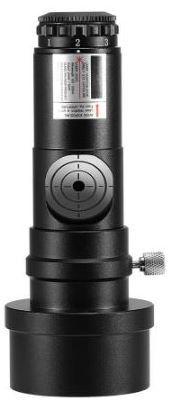
It is possible to manually collimate a reflector, but the method takes some experience and isn’t the best choice for beginners.
If you have a telescope and feel now’s the time to expand your arsenal, hopefully I’ve highlighted some of the popular telescope accessories that won’t break the bank but can markedly enhance your observing experience.
Wishing you clear skies and good times.
