If you want to use a DSLR camera, mirrorless camera, or just your smartphone, this guide ‘Astrophotography For Beginners’ walks you through the gear, techniques, and tips to start astrophotography with confidence.
No jargon, no pressure—just practical advice for families, hobbyists, and curious explorers.
If you’re just getting started, you can explore our astrophotography hub for a complete overview of equipment, techniques, and beginner-friendly guides.
Astrophotography requires some kit to get started. So lets take a look at some options for what you’ll need, how they work, and things to look out for.
Table Of Contents
- 2. Using A Camera Mount
- 2.1 Tripod
- 2.2 Star Tracker
- 2.3 Telescope
- 3. What Kind Of Photos Can You Take?
- 3.1 Landscape/Milky Way Shots
- 3.2 Planetary Photos
- 3.3 Moon Shots
- 3.4 Deep Sky Objects
Side Note: Many beginners actually start with binoculars before moving into photography – as you can discover in our guide to the best binoculars for stargazing.
1. Astrophotography Basics
1.1 Choosing a Camera
The best camera for beginners is one with manual controls and interchangeable lenses — either DSLR (Digital Single Lens Reflex) or mirrorless.
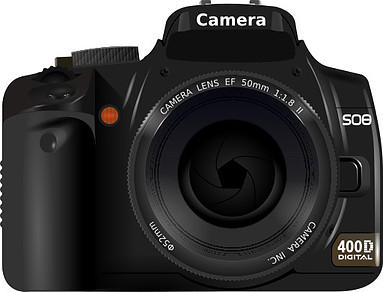
DSLR Cameras:
- How they work: Use a mirror to reflect light to an optical viewfinder.
- Pros: Larger lens selection, longer battery life, optical viewfinder.
- Cons: Bulkier and heavier, often requires heavier mounts.
When the shutter releases, the mirror flips up and allows light to fall directly onto the sensor.
Mirrorless Cameras:
- How they work: Light passes directly onto the image sensor with no mirror.
- Pros: Lighter and more compact, advanced focusing features, great for travel astrophotography
- Cons: Slightly shorter battery life, fewer lenses (although improving fast).
Mirrorless cameras display a live preview through an electronic viewfinder or rear screen.
Tip: Both DSLR and mirrorless deliver superb night-sky results. Choose based on weight and lens availability.
Looking for your first camera? Check out our guide to The Best Astrophotography Camera For Beginners to help you choose the right setup.
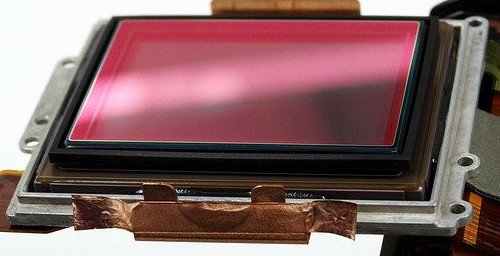
1.2 Camera Sensors Explained
Your sensor size affects your field of view and low-light performance.
Full-Frame Sensors (36mm × 24mm)
- Excellent low-light performance
- Wider field of view
- Ideal for Milky Way landscapes
Crop Sensors
- Smaller sensor = narrower field of view
- Narrower field of view = greater magnification effect
- Great for planets and deep-sky object close-ups
A sensor contains millions of tiny light collectors called photosites. A 32MP sensor has 32 million individual collectors capturing the light from your lens.
1.3 Understanding ISO
- ISO controls how sensitive your camera is to light.
- Higher ISO = brighter image but more noise.
- Lower ISO = cleaner image but may be too dark
Starter settings:
- Milky Way: ISO 800–1600
- Deep sky: ISO 1600+
Rule of Thumb:
- Image too dark → increase ISO
- Image too grainy → lower ISO
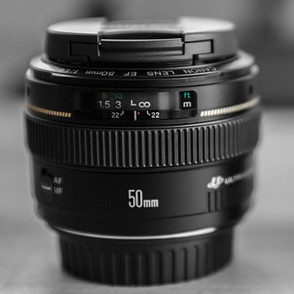
1.4 Choosing the Right Lens
Best Lens Types
- Wide-Angle (14-20mm): Perfect for night sky landscapes.
- Telephoto (200-600mm): Best for Moon, planets, or deep sky objects.
Key Lens Terms
- Aperture (f-number): Lower f-number = more light (f/1.8–f/2.8 ideal)
- Prime Lens: Sharper and faster, great for night sky
- Zoom lens: Flexible but usually slower in low light
- Manual Focus: Essential for sharp star or deep sky shots.
Interchangeable lens cameras accept a wide variety of different lenses, from wide angle lenses showing lots of detail, to telephoto lenses which bring the subject closer.
The choice of best lens for astrophotography for beginners can have as big an impact on the quality of your photos as the camera you use.
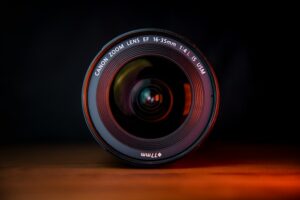
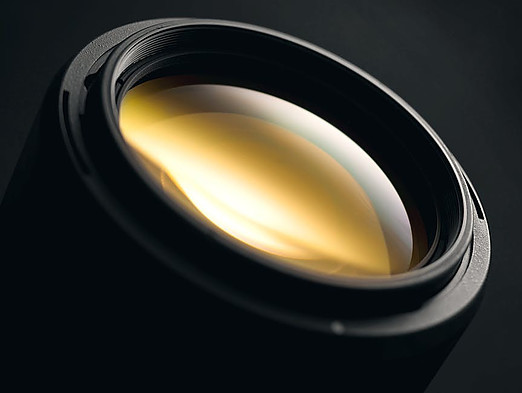
The camera lens is usually described in a couple of ways, it’s maximum aperture and its focal length.
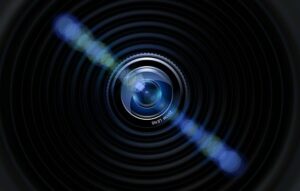
Aperture Explained
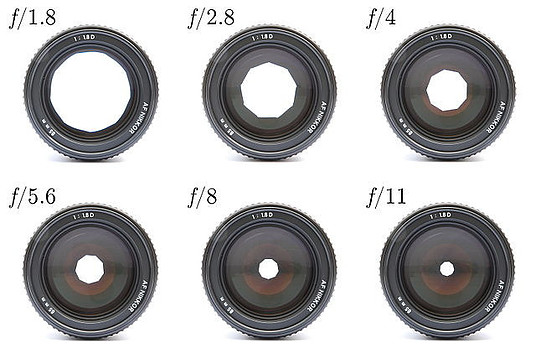
The aperture is the adjustable opening at the centre of the lens that lets light into the camera, and it works in a similar way to the pupil of your eye. It can be made bigger or smaller, to allow more or less light to reach the camera sensor.
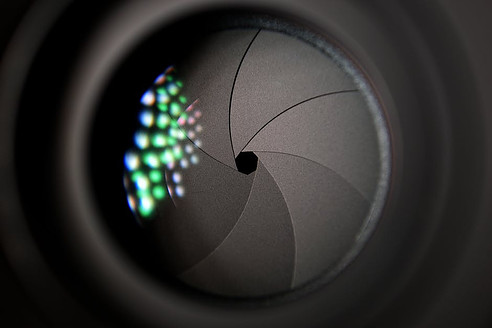
The blades in this lens block any light except through the aperture (centre hole)
The aperture setting is typically identified by an f-number, written as “f/” followed by a number. A lens with a large maximum aperture is often described as a ‘fast’ lens.
- f/1.8 or f/2.8 → large opening → excellent for night sky
- f/8 or f/11 → small opening → less useful for astrophotography
Focal Length Explained
The focal length is measured as the distance between the lens and the image sensor when the subject is in focus, and this is measured in millimetres (e.g. 24mm, 50mm or 100mm).
This tells us how much of a particular scene will be captured by that lens, and is referred to as the angle of view.
- Short focal length: (14–24mm): Wide view
- Long focal length: (100–600mm): Narrow, zoomed-in view
Short lenses are perfect for capturing entire landscapes; long lenses are best for Moon and planetary work.
Want even sharper close-ups of the Moon? Take a look at the Best Nikon Lens for Astrophotography for capturing lunar and night-sky detail
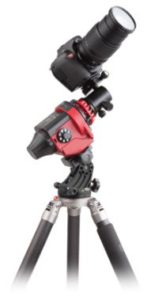
2. Using A Camera Mount
In addition to a camera and lens, you should set yourself up with a camera mount for stable picture taking. This could either be on a fixed tripod, a star tracker or a telescope.
Mount Type → Best For
- Fixed tripod → Milky Way & nightscapes
- Star tracker → Deep sky
- Telescope → Planets & Moon
2.1 Tripods
look for one that is:
- Strong but portable
- Rated to handle your camera (and star tracker if added)
- Equipped with a ball head for flexible movement
- lightweight in construction (but not at the expense of stability).

Without doubt stability is the most important feature of a good tripod. Any movement, for example due to wind, could result in your photos ending up a blurry mess.
If you’re not sure which tripod to choose, here are some reliable tripod recommendations for long-exposure astrophotography that maintain stability in windy conditions.
Tip: A remote shutter release or timer avoids shake when taking the shot.
The down side with a fixed tripod is that without incorporating a star tracker, long exposure times can cause ‘star trails’ to appear in your photos.
Star trails are caused by the rotation of the Earth. There is a certain amount of exposure time before the Earth will have rotated enough to start to “smear” or “trail” the stars across your image frame.
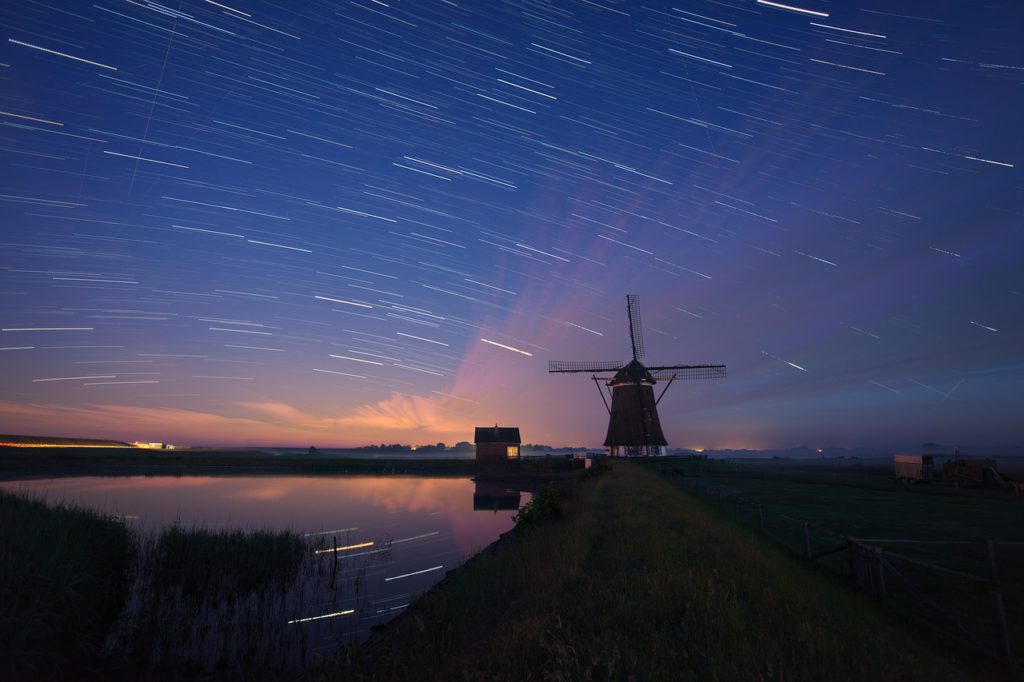
It’s possible to make some adjustments for this, but the upshot is that you get better results by adding a star tracker.
2.2 Star Trackers
- Small, portable, and beginner-friendly
- Sits between your tripod and camera
- Essential for deep-sky images without a telescope
Star trackers were invented as a way for telescopes to automatically track objects in the night sky without the need to manually move the telescope to keep the object in the eyepiece. Anyone who has tried to move a telescope for this reason will know how tricky a business that is!
A star tracker rotates your camera at the same speed as the Earth rotates, preventing star trails and allowing long exposures.
Once aligned with the pole star, the tracker compensates for the sky’s movement.
2.3 Telescopes
If you already have a telescope (and so probably a tripod with it), you can attach a DSLR or mirrorless camera using a simple adapter. Even smartphones can be adapted using clip-on mounts.
This set up is perfect for:
- Planetary close-ups (Jupiter, Saturn, Mars)
- Moon photography
- Deep sky targets like nebulae and galaxies
If you’re just starting out and want something compact, beginner-friendly tabletop telescopes are a great way to experiment with Moon and planetary imaging before upgrading later.
3. What Kind of Photos Can You Take?
Astrophotography offers many ways to explore the night sky. Here are the most popular beginner-friendly options.
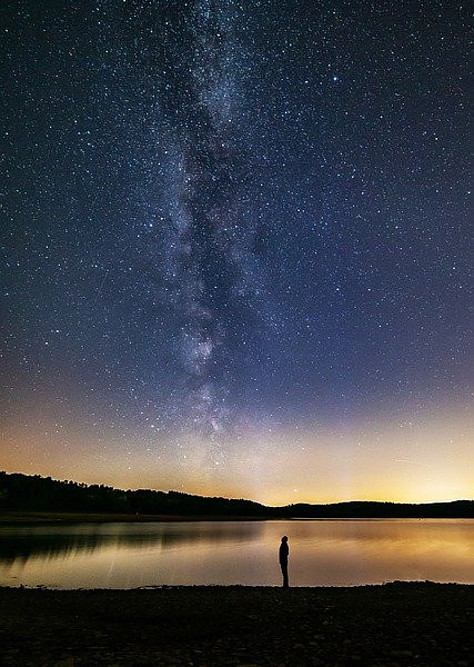
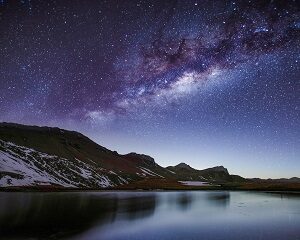
3.1 Landscape / Milky Way Shots
Landscape shots of the night sky are the most popular form of Astrophotography for beginners, particularly shots of the Milky Way. This is partly because you can get great results relatively easily.
Recommended settings:
- Mode: Manual
- Lens: 14–20mm
- Aperture: f/1.8–f/2.8
- Exposure: 20–30 seconds (tripod) or longer on a star tracker
- ISO: 800–1600
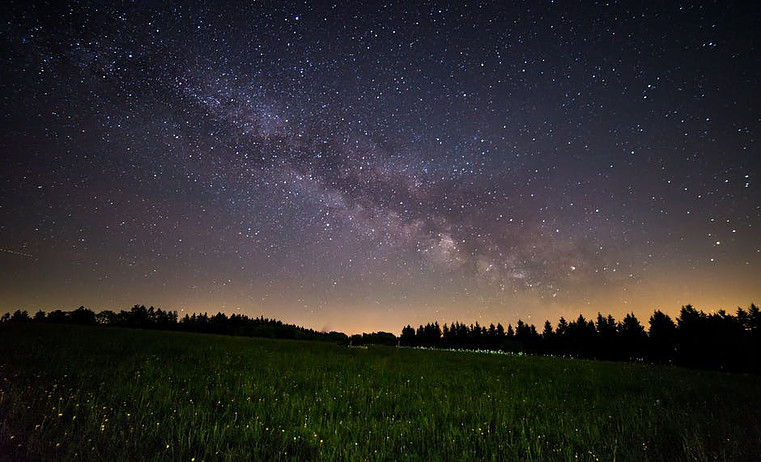
A full-frame camera helps you capture a wider scene, but crop sensors work well too.
3.2 Planetary Photos
Taking photos of the Milky Way invariably means taking a wide angle shot, but photos of planets can involve more choice.
Options:
- Use landscape settings for wide shots with bright planets
- Attach your camera to a telescope for detailed close-ups
- Use long telephoto lenses for tighter framing
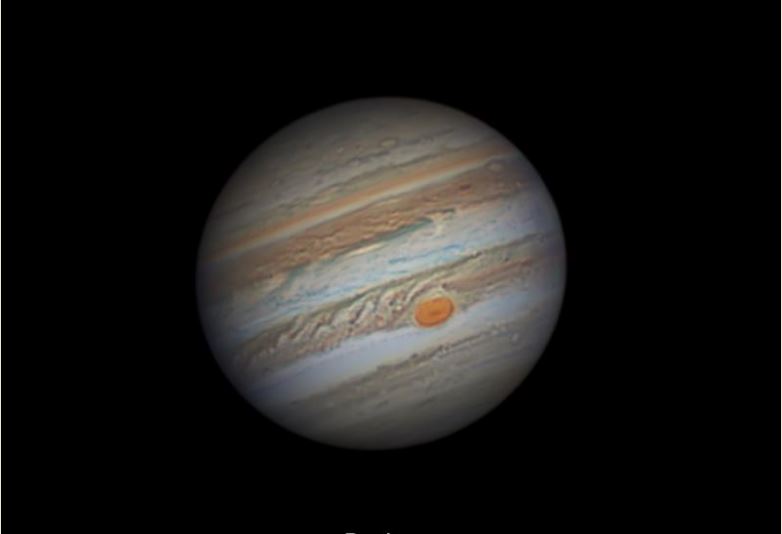
Planets appear tiny, so magnification is key. Crop-sensor cameras perform exceptionally well for planetary shots due to the narrower field of view.
3.3 Moon Shots
The Moon is bright — much easier to photograph than deep sky.
Recommended settings:
- Lens: 400mm (crop) or 600mm (full-frame)
- Aperture: f/11
- Shutter speed: 1/125
- ISO: 100
- Use a timer or remote release
Different lunar phases provide dramatically different results. This makes the brightest and largest object in the night sky also one of the most satisfying to photograph.
The Moon moves quickly across the sky, so fast shutter speeds help keep it sharp.
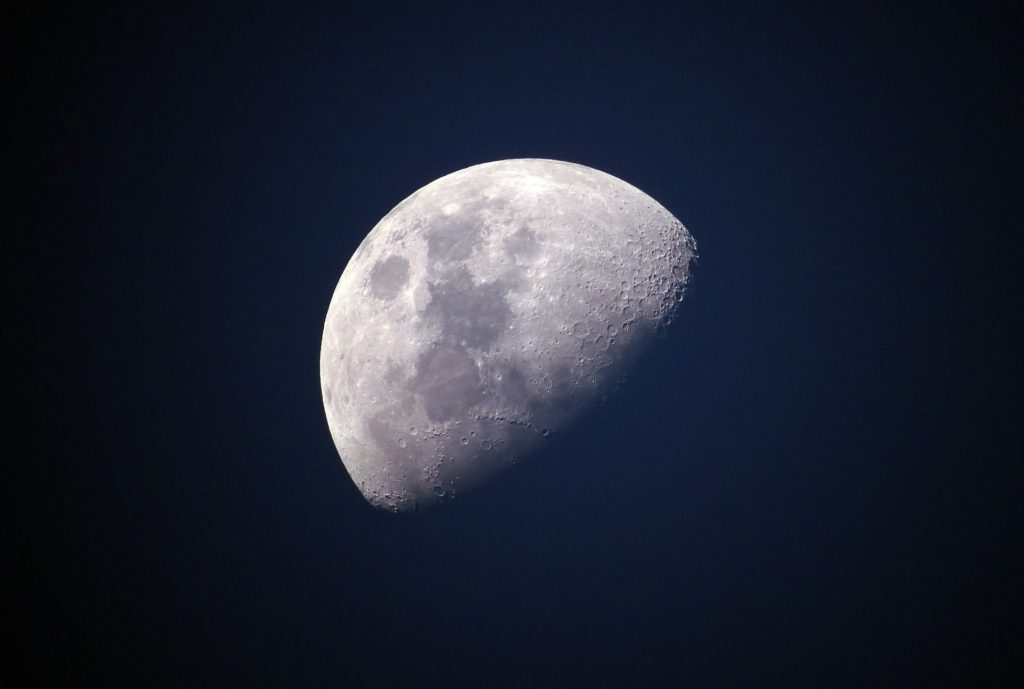
To improve contrast and reduce glare, you may want to use a lunar filter. Here are the best moon filters for telescopes to enhance detail in your shots.
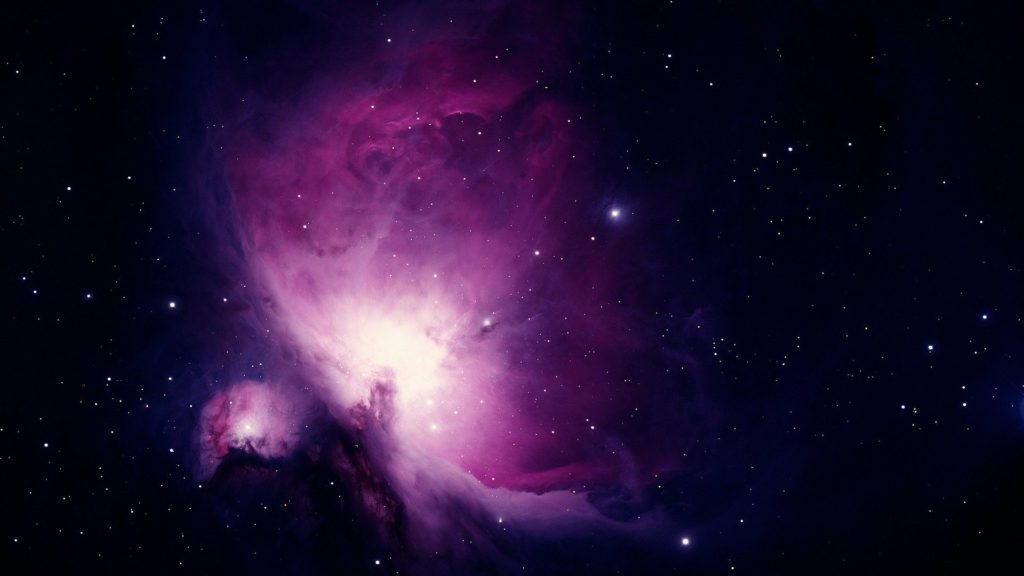
3.4 Deep Sky Objects (Nebulae, Clusters, Galaxies)
If using a camera without a telescope, the key to taking deep sky astrophotography images is to have the camera mounted on a star tracker, which itself is attached to a study tripod.
Deep sky targets are faint, so stability and long exposures are essential.
Without a Telescope (Camera + Star Tracker)
- Lens: 135mm
- Aperture: f/2–f/2.8
- ISO: 1600
- Exposure: ~60 seconds
With a Telescope (Beginner Setup)
- The telescope acts as the lens
- ISO: 800
- Exposure: 120 sec
- Tracking Mount Required
If you have a telescope then attaching a mirrorless camera or DSLR to it has the advantage that the telescope then acts like a camera lens. This gives a greater aperture and focal length, required to reveal more fine detail of some deep sky objects.
Conclusion: Start Simple and Grow at Your Own Pace
Astrophotography doesn’t have to be expensive or intimidating.
With just a basic camera, a sturdy tripod, and a little patience, you can begin capturing the Moon, the stars, and the Milky Way far more easily than most people realise.
As your confidence grows, you can expand into faster lenses, star trackers, or even telescopes — but none of that is required to take your first step.
Choose the type of night-sky photography that excites you most, experiment with the settings in this guide, and enjoy the process of learning. Every night out under the stars will teach you something new.
If you want to explore more beginner-friendly gear and techniques, check out the other guides on AstronomyShack — and most importantly, have fun capturing the night sky.
Frequently Asked Questions
1. Can you do astrophotography without a star tracker?
Yes — beginners can get great results with just a camera and tripod. For wide-angle Milky Way and night-scape shots, you don’t need a tracker at all. A star tracker becomes helpful only when you want long-exposure deep sky images like nebulae and galaxies.
2. Do I need a full-frame camera for astrophotography?
No. Full-frame cameras perform better in low light, but crop-sensor cameras are perfectly capable and even offer advantages for planetary and Moon photography due to their narrower field of view. The most important thing is having manual control over exposure, aperture, and ISO.
3. What settings should beginners use for astrophotography?
A good starting point for Milky Way photography is:
- Aperture: f/1.8–f/2.8
- Exposure: 20–30 seconds
- ISO: 800–1600
These settings will vary slightly depending on your lens and local light conditions, but they provide a reliable baseline for first attempts.
4. What lens is best for a beginner astrophotographer?
A wide-angle lens between 14–20mm with a fast aperture (f/1.8–f/2.8) is ideal for capturing wide night-sky landscapes. For Moon and planetary shots, a long telephoto lens — typically 300–600mm — or a telescope adapter works best.
5. How do I focus my camera for night-sky photography?
Switch to manual focus, point your camera at a bright star or the Moon, and zoom in using live view. Slowly adjust the focus ring until the star is as small and sharp as possible. Many lenses have “infinity” marks, but they’re not always precise, so manual fine-tuning is essential.