Stargazing is one of the most accessible, awe‑inspiring hobbies you can start. You don’t need a telescope, you don’t need a dark‑sky desert, and you definitely don’t need a degree in astronomy. What you do need is curiosity, a little patience, and a simple plan to get started.
This step‑by‑step guide will walk you through how to start stargazing, what equipment you actually need (and what you don’t), how to read the night sky, and how to build confidence as you explore deeper.
Whether you’re doing this alone, with kids, or as a new hobby to unwind, this guide gives you everything you need to begin.
If you’re completely new, it may help first to check out ‘What is astronomy?’ for an explanation of the basics.
Why Stargazing Is the Perfect Beginner Hobby
Before diving into the steps, it helps to understand why stargazing is such a rewarding pursuit:
- It’s inexpensive — you can start with just your eyes.
- It’s relaxing — a natural antidote to busy, screen‑filled days.
- It’s educational — you’ll learn about science, mythology, and space.
- It’s endlessly scalable — from naked‑eye observing to astrophotography.
- It’s family‑friendly — kids love spotting planets and constellations.
Stargazing has grown into a really popular pastime all over the world. Interest in astronomy and stargazing has increased, especially with easier access to information online and affordable gear.
There’s something special about seeing planets, constellations, and maybe even meteors in real time. Add in the thrill of spotting something you’ve never seen before, and it’s easy to see why so many people get hooked on it.
Some people join astronomy clubs, while others prefer solo back garden observing. Either way, it’s a hobby that’s open to all ages and experience levels.
Most importantly, stargazing reconnects you with something bigger than yourself. The night sky has been a source of wonder for thousands of years. You’re joining a long tradition of explorers, dreamers, and observers.
Step 1: Start With Your Naked Eyes
Getting started with stargazing means keeping things simple. The night sky is vast, but starting with the basics helps you ease in without feeling overwhelmed.
Before you buy anything or download any apps, the best place to begin is simply by looking up. Your eyes are powerful tools, and learning to use them effectively builds the foundation for everything that comes later.
First, let your eyes adjust to the darkness, which might take a few minutes. This adjustment is key to spotting more stars, so be patient. You might be surprised by what you can see without any equipment.
What you can see with no equipment
- Constellations
- Bright stars
- The Milky Way (in dark locations)
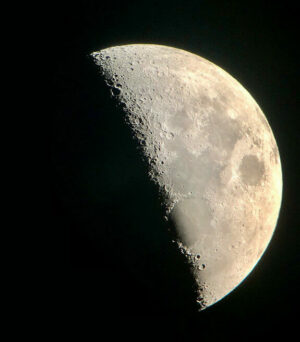
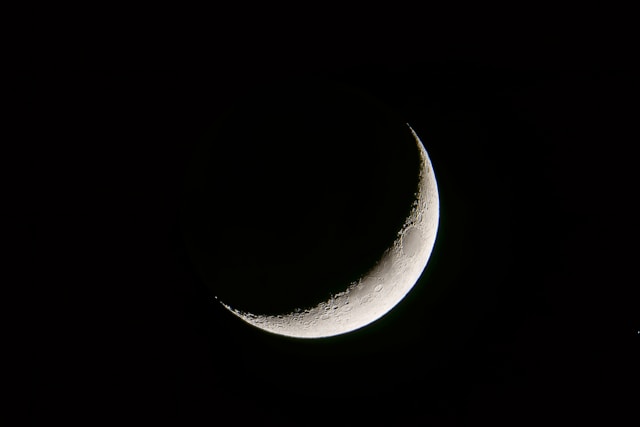
- The Moon’s major features
- Planets like Venus, Jupiter, Mars, and Saturn
- Meteor showers
- Satellites and the ISS
Why this step matters
Jumping straight into telescopes often leads to frustration. Learning the sky first helps you:
- Understand where objects are located
- Recognize seasonal patterns
- Build confidence
- Avoid wasting money on the wrong equipment
How to begin
- Go outside from 30–60 minutes after sunset.
- Let your eyes adjust to the dark.
- Look for the brightest stars first.
- Try to identify one constellation. Just one.
Once you can reliably find a few constellations, everything else becomes easier.
Step 2: Learn the Sky Using Apps or Star Maps
Once you’ve spent time observing with your eyes, the next step is learning what you’re actually looking at. Modern tools make this incredibly easy, and they help you build confidence quickly.
You don’t need to memorise the sky from scratch, modern tools make it incredibly easy. Free smartphone apps are great for real-time guidance. Using a simple star chart or a mobile app helps you know what’s up in the sky that night.
Best free stargazing apps
- SkySafari
- Stellarium Mobile
- Star Walk 2
- Skyview – App Store (For iOS smart devices)
- Skyview – Google Play (For Android smart devices)
These apps use your phone’s sensors to show you exactly what you’re looking at. Point your phone at the sky, and the app labels stars, planets, and constellations.
If you prefer paper, a planisphere (rotating star wheel) is a classic tool that works without batteries and teaches you how the sky changes month by month.
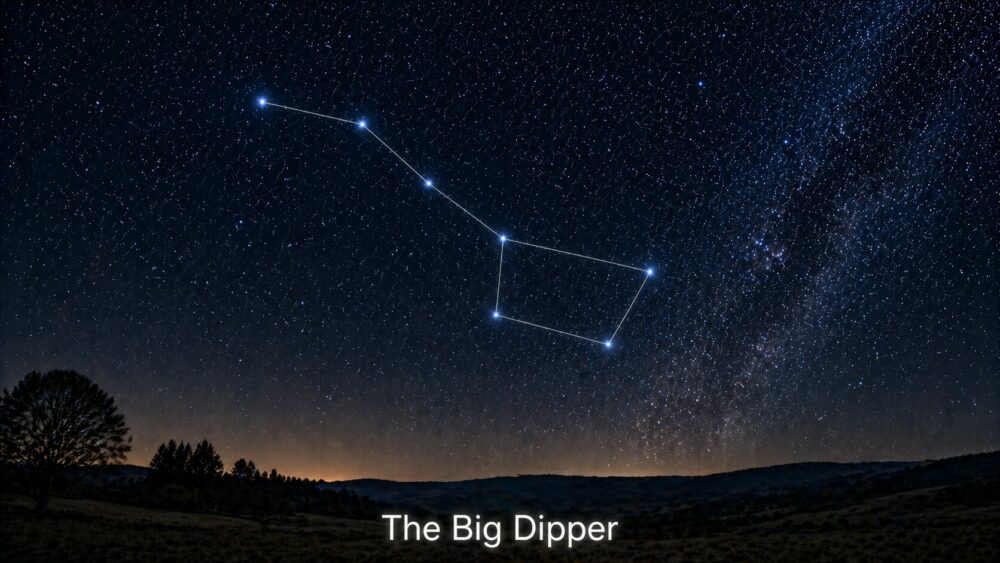
Constellations – What to learn first
- The Big Dipper (or Plough)
- Cassiopeia
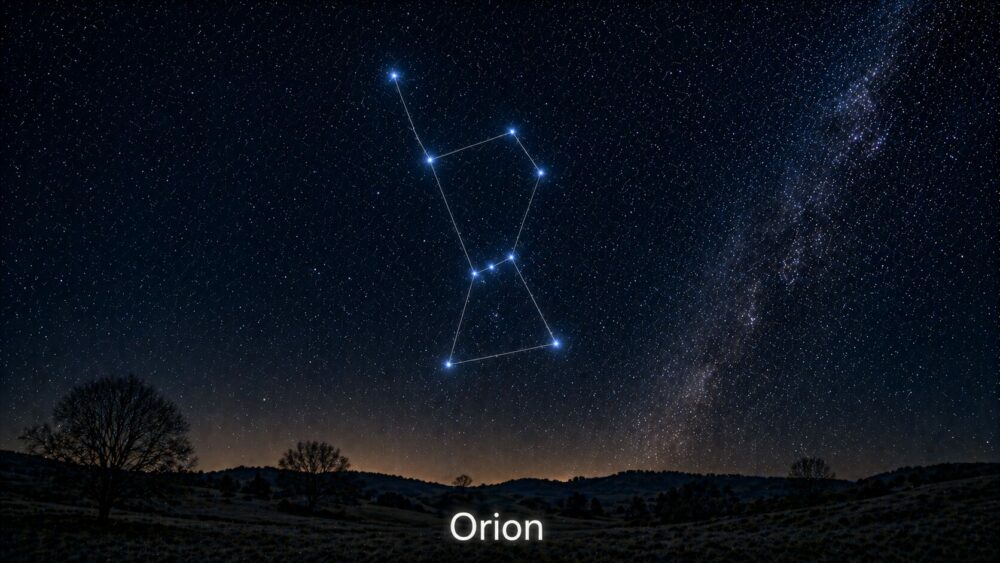
- Orion
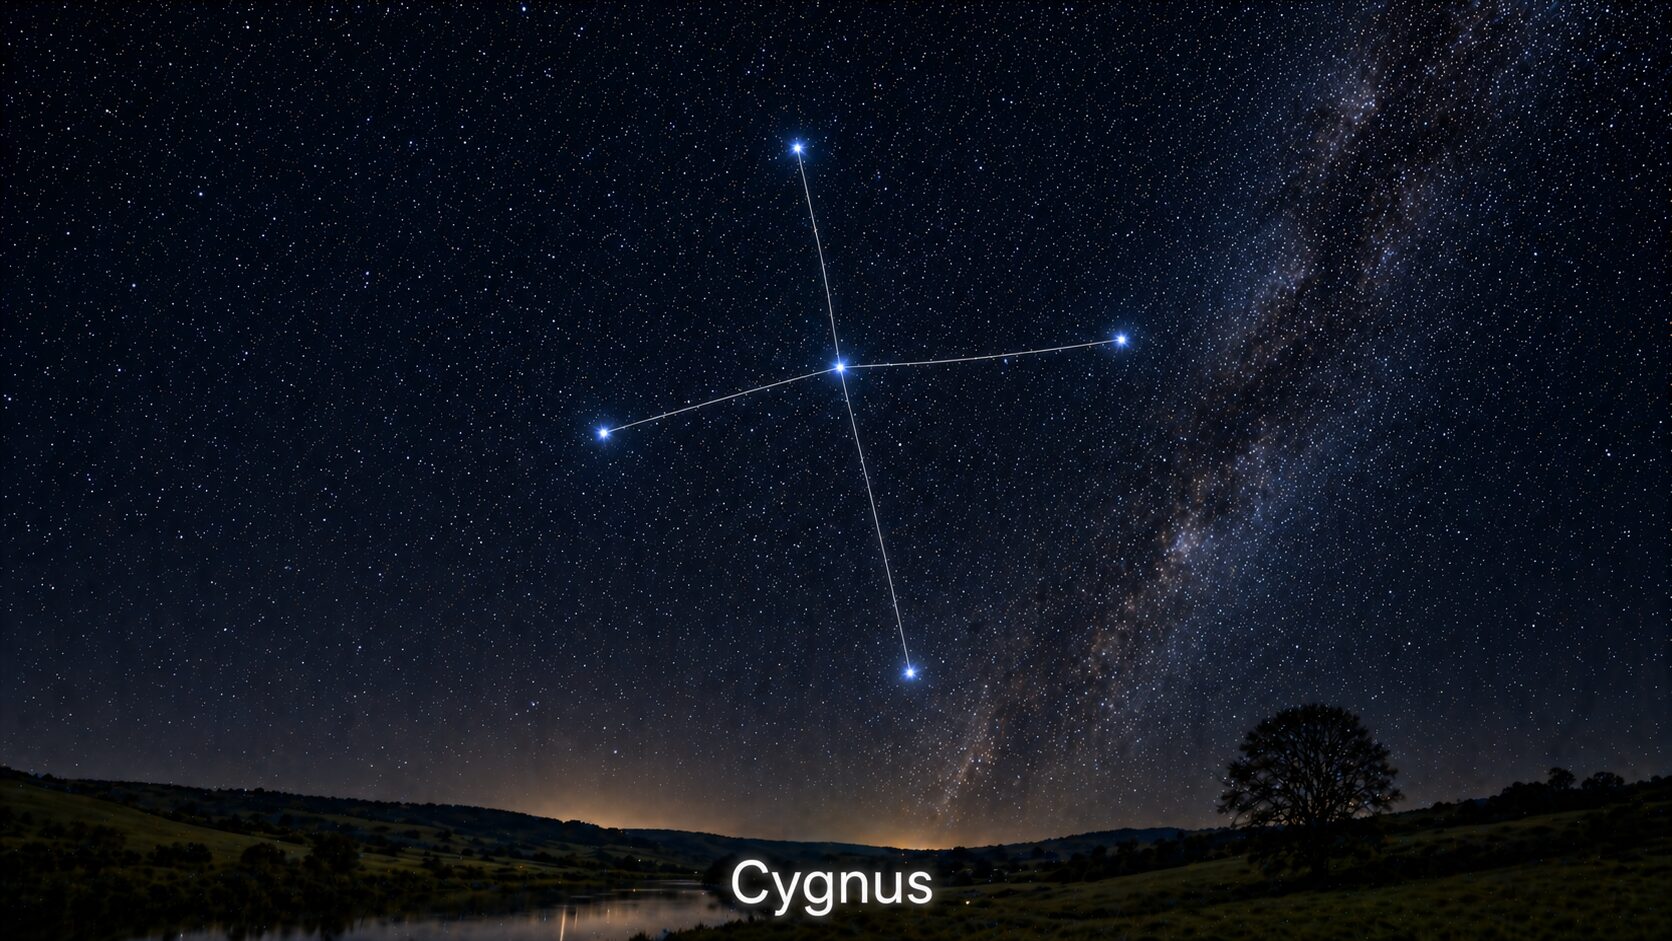
- Cygnus
- Scorpius (summer)
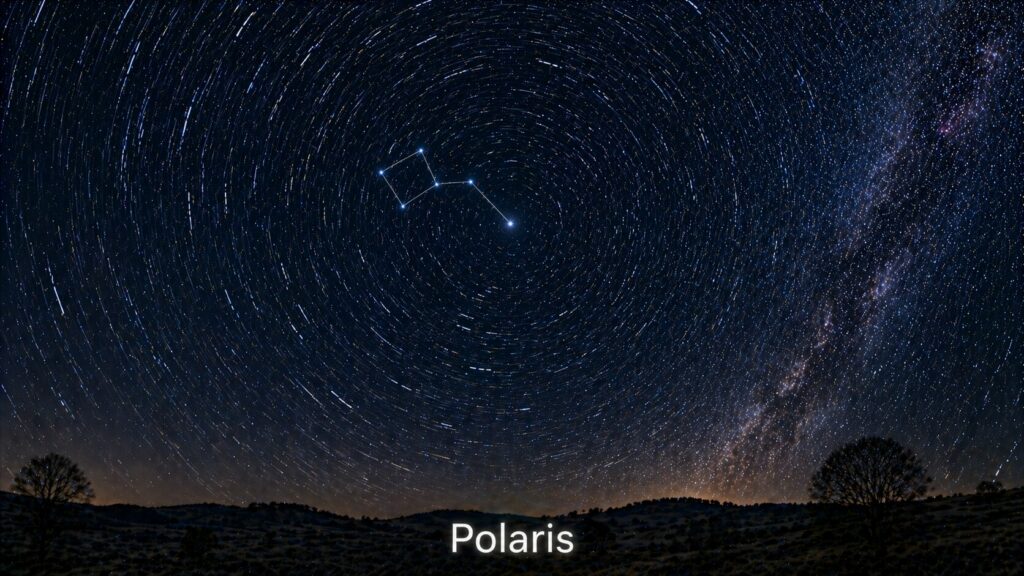
- Polaris (the North Star)
I’ve picked out Polaris even though it’s a star, not a constellation, because it’s a great one to learn.
Part of the constellation of Ursa Minor, or the ‘Little Dipper’ as it’s known, Polaris sits almost directly in line with Earth’s rotational axis above the North Pole. Because of this, it appears nearly motionless in the sky while the stars of the northern sky seem to circle around it.
These constellations (and Polaris) act like signposts. Once you know them, you can navigate the night sky much more easily.


Step 3: Choose the Right Time and Place
Even if you know the sky well, your viewing conditions can make or break your stargazing session. This step helps you understand how to pick the best possible time and location for observing.
Find a darker location
If you live in an area that has an ‘acceptable’ level of light pollution, it may be that you’re happy, to begin with, with what you’re able to see from where you live.
Alternatively, you might have the option of observing from open fields or hills away from city centres. They can offer significantly better views than urban backyards. You don’t need a remote wilderness — even a local park or field away from streetlights helps.
You may consider really going for it, by searching for dark sky locations in your area. These spots are designated for their minimal light interference, allowing for much clearer views of the heavens.
National parks or rural areas often provide ideal settings. To help with this, use light‑pollution maps like:
Aim for Bortle Class 4–5 skies if possible, but even Class 7–8 skies can show planets and bright stars.
Check the Moon phase
The Moon is beautiful, but it’s also bright. The bright glow of the full Moon can drown out the light from dimmer stars and other celestial objects, making them harder to spot. For deep‑sky objects, avoid nights near the full Moon.
Best nights for stargazing:
- New Moon
- Crescent Moon
- First/last quarter (for lunar observing)
Check the weather
If you want to travel to an area with less light pollution, it’s worth looking up the weather forecast first to make sure it’ll be clear. Clouds, fog, or even humidity can really block your view.
You want:
- Clear skies
- Low humidity
- Low wind
- Stable atmospheric conditions (called “good seeing”)
Apps like Clear Outside or Astrospheric can help you plan.
Step 4: Start With Binoculars Before Buying a Telescope
Before you jump into the world of telescopes, binoculars offer a gentle, affordable, and surprisingly powerful introduction to magnified observing.
They bridge the gap between naked‑eye viewing and more advanced equipment. This is the step most beginners skip — and regret later, because binoculars are often the smarter first upgrade.
They help you learn the sky faster, avoid frustration, and deliver impressive results from the very first night.
Why binoculars are the perfect first upgrade
Binoculars are intuitive — you look through them just as you would during the day. There’s no setup, no alignment, and no learning curve. Yet the jump in what you can see is dramatic.
Key benefits for beginners:
- Affordable compared to telescopes
- Lightweight and portable
- A wide field of view makes objects easier to find
- Great for both astronomy and daytime use
- No collimation or technical adjustments needed
They’re the quickest way to get that “wow” moment without spending hundreds of pounds.
To get even more out of your setup, this guide to binocular accessories for stargazing shows how simple upgrades can improve stability and comfort.
Recommended sizes
Choosing the right size matters. The numbers (e.g., 10×50) represent magnification × objective lens diameter.
8×42 — Best all‑round choice
- Bright, steady, and easy to hold
- Ideal for beginners and kids
- Great for handheld use
10×50 — More power, brighter views
- Excellent for star clusters and the Moon
- Slightly shakier due to higher magnification
- Best paired with a tripod and tripod adapter for long sessions
If you plan to use a tripod, these binocular tripod adapters for astronomy make a huge difference in stability.
7×50 — Great for dark‑sky locations
- Wide field of view
- Very bright image
- Perfect for scanning the Milky Way
If you’re unsure, 8×42 is the safest and most versatile starting point.
- 8×42 — best all‑round choice
- 10×50 — brighter and more powerful, but shakier
- 7×50 — great for dark skies
What you can see with binoculars
You’ll be amazed at how much the night sky opens up with even a modest pair of binoculars.
Expect to see:
- Craters and mountain ranges on the Moon
- Jupiter’s four largest moons (as tiny points of light)
- Saturn’s oval shape
- The Pleiades (M45) in stunning detail
- The Orion Nebula (M42) as a glowing cloud
- The Andromeda Galaxy (M31) as a soft, elongated smudge
- Star clusters like the Beehive (M44) and Hyades
These views are far beyond what the naked eye can show, yet require no special skills.
Step 5: Choose Your First Telescope (When You’re Ready)
If you’ve learned the sky and enjoyed binocular observing, you’re ready for a telescope. But choosing one can be overwhelming. Here’s how to simplify it.
The Best Beginner Telescope Types: Refractor, Reflector, Tabletop
1. Refractor Telescopes (Great for simplicity and the Moon/planets)
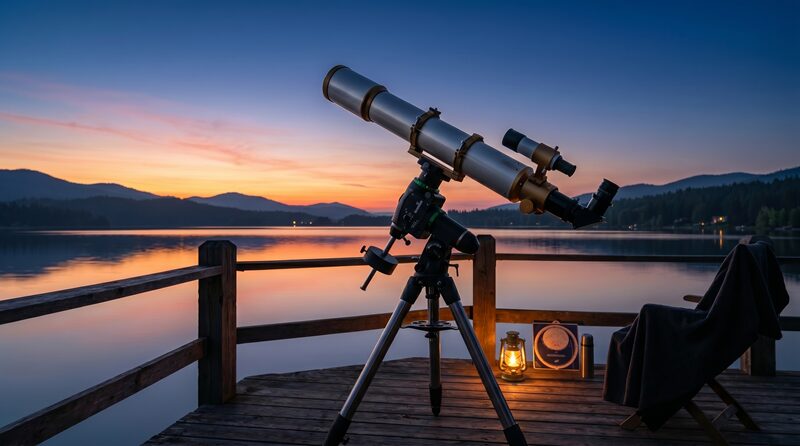
Refractors are the classic long‑tube telescopes most people picture. They use lenses rather than mirrors, which makes them low‑maintenance and easy to use.
Why beginners love them:
- Very little maintenance
- Sharp, high‑contrast views
- Excellent for the Moon, planets, and bright targets
- Lightweight and portable
Things to keep in mind:
- Good refractors can be more expensive per inch of aperture
- Cheaper models may show chromatic aberration (colour fringing)
Best for: Beginners who want a simple, grab‑and‑go telescope with crisp views and minimal setup.
If you prefer something simple and low maintenance, these best refractor telescopes for beginners are ideal for starting out.
2. Reflector Telescopes (Best value for deep‑sky objects)
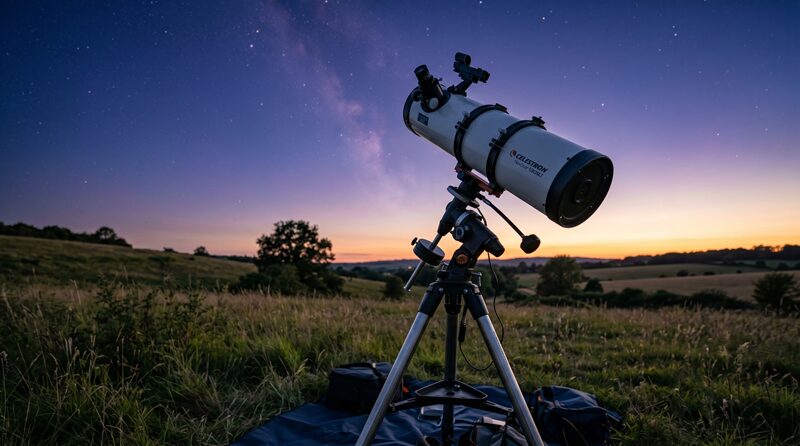
Reflectors use mirrors instead of lenses, providing you with significantly more aperture for your money. This means brighter views and the ability to see fainter objects.
Why beginners love them:
- Best price‑to‑performance ratio
- Great for galaxies, nebulae, and star clusters
- Larger apertures without huge cost
Things to keep in mind:
- Requires occasional collimation (mirror alignment)
- Bulkier than refractors
- Needs time to cool to outdoor temperature
Best for: Beginners who want the brightest, most detailed views for the lowest cost and don’t mind a little maintenance.
For deeper space viewing, these best reflector telescopes for beginners offer excellent value and performance.
3. Tabletop Dobsonian Telescopes (Compact, affordable, and powerful)

Tabletop Dobsonians are small reflectors mounted on simple, sturdy bases. They offer surprisingly impressive performance in a compact, budget‑friendly package.
Why beginners love them:
- Extremely easy to use — just point and look
- Very affordable
- Portable enough for travel or garden use
- Great for kids and adults alike
Things to keep in mind:
- Needs a stable surface (table, stool, crate)
- Smaller aperture than full‑size Dobsonians
- Not ideal for high‑magnification planetary viewing
Best for: Beginners who want a low‑cost, no‑fuss telescope that still delivers impressive views of the Moon, planets, and bright deep‑sky objects.
For a compact and beginner-friendly option, take a look at these best tabletop telescopes for adults
What You Can See With Any of These Beginner Telescopes
- Saturn’s rings
- Jupiter’s cloud bands and moons
- Mars’ polar cap (when close)
- The Moon in stunning detail
- Star clusters like M13
- Nebulae like Orion
- Galaxies such as Andromeda (as faint smudges)
Beginner Mistakes to Avoid
- Buying a cheap “600× magnification” telescope
- Choosing a telescope that’s too heavy or complicated
- Expecting Hubble‑like images
- Ignoring collimation on reflectors
- Choosing a poor‑quality mount
A good beginner telescope should feel intuitive, stable, and enjoyable to use — not frustrating.
If you want a deeper understanding of telescopes, this How To Buy A Telescope – a beginner’s guide walks you through everything step by step.
Step 6: Learn Basic Stargazing Techniques
Now that you have the right tools, it’s time to refine your technique. Small adjustments in how you observe can dramatically improve what you see through binoculars or a telescope.
Let your eyes adapt
It takes 20–40 minutes for your eyes to fully adjust to darkness. So, if possible, avoid bright lights and use a red flashlight to preserve night vision.
If you don’t have one yet, here are some of the best astronomy flashlights designed specifically to preserve night vision.
Use averted vision
Look slightly to the side of faint objects. Your peripheral vision is more sensitive to light.
Start with low magnification
High magnification narrows your field of view and makes objects harder to find. Begin wide, then zoom in.
Be patient
Atmospheric turbulence comes and goes. Wait for moments of clarity — called “steady seeing” — to catch fine details.
Keep a stargazing journal
Record:
- What you saw
- Conditions
- Equipment used
- Questions for next time
This builds your skills faster than anything else.
Step 7: Explore Easy Beginner Targets
With your skills improving, it’s time to enjoy some of the night sky’s most rewarding sights. These objects are bright, easy to find, and perfect for building confidence.
Best beginner objects (naked eye)
- The Moon
- Venus (evening or morning star)
- Jupiter
- Orion’s Belt
- The Summer Triangle
- The Milky Way (dark skies)
Best beginner objects (binoculars)
- Pleiades (M45)
- Orion Nebula (M42)
- Andromeda Galaxy (M31)
- Beehive Cluster (M44)
- Hyades Cluster
Best beginner objects (telescope)
- Saturn’s rings
- Jupiter’s Great Red Spot
- The Moon’s terminator (shadow line)
- Hercules Cluster (M13)
- Ring Nebula (M57)
Step 8: Try Simple Astrophotography (Optional)
If you’re enjoying stargazing and want to capture what you see, astrophotography is a natural next step. You can start small and grow at your own pace.
Easiest way: smartphone + tripod
You can photograph:
- The Moon
- Conjunctions
- Star trails
- The Milky Way (with long exposure mode)
You can even capture what you see through binoculars using smartphone adapters for binoculars.
Next step: DSLR or mirrorless camera
With a tripod and a wide‑angle lens, you can capture:
- Milky Way panoramas
- Meteor showers
- Night landscapes
Advanced step: tracking mounts
These allow long exposures for:
- Nebulae
- Galaxies
- Star clusters
Astrophotography is a deep rabbit hole — but a fun one. If you’d like to go further, this guide to astrophotography for beginners covers everything from gear to technique.
Step 9: Join the Stargazing Community
Stargazing doesn’t have to be a solo hobby. Connecting with others accelerates your learning and keeps you inspired.
Where to find other stargazers
- Local astronomy clubs
- Facebook groups
- Reddit communities
- Star parties
- Planetariums
- Online forums
Benefits of joining:
- Try different telescopes
- Learn from experienced observers
- Get help with equipment
- Discover new targets
- Stay motivated
Most astronomers love helping beginners — you’ll be welcomed instantly.
Step 10: Keep Exploring and Level Up
Once you’ve mastered the basics of how to start stargazing, you can expand your hobby in countless directions.
Possible next steps
- Learn constellation mythology
- Study planetary science
- Explore deep‑sky objects
- Try sketching what you see
- Learn telescope collimation
- Upgrade eyepieces
- Start astrophotography
- Attend a dark‑sky festival
- Travel to a Bortle 1–2 site
Stargazing is a lifelong journey. There’s always something new to discover.
Final Thoughts: Your Stargazing Journey Starts Tonight
Learning how to start stargazing isn’t complicated — it’s about slowing down, looking up, and letting curiosity guide you. Start with your eyes, learn the sky, choose the right equipment when you’re ready, and enjoy the process.
The night sky is always there, waiting for you. Every clear night is an invitation to explore.